Before we begin: if you just want the quick answer as to which is our favorite crème brûlée torch, it’s the EurKitchen Culinary Cooking Butane Torch. We love its power, endurance, safety features, and gas gauge!
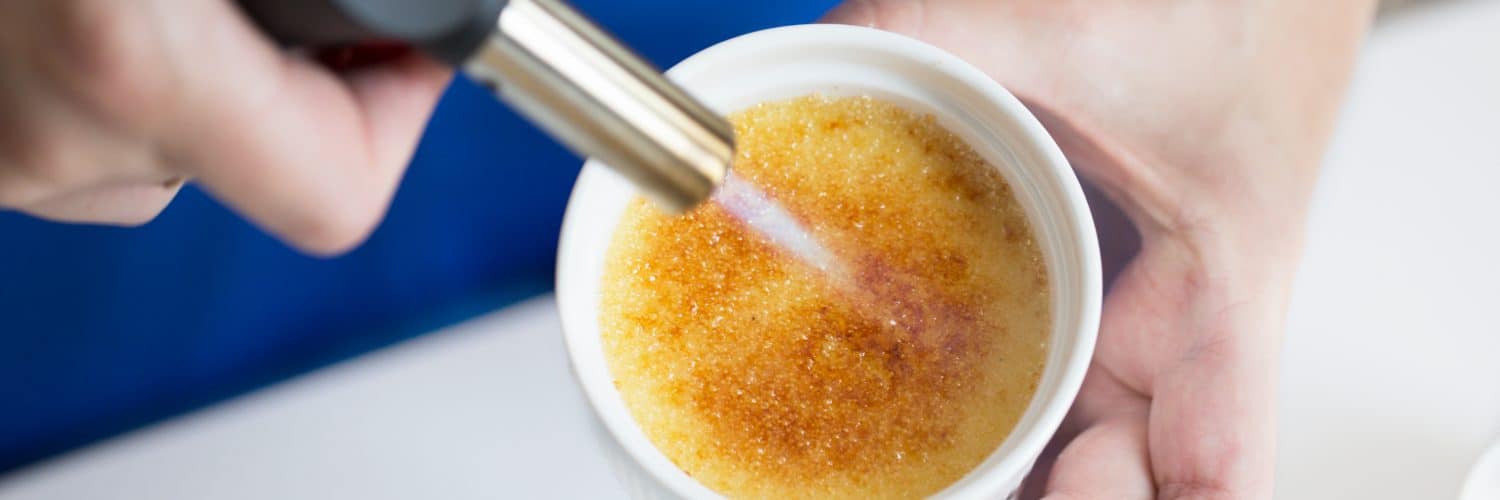
What’s crème brûlée without the brûlée?! Unless you want just a simple custard, that beautiful, shatteringly crunchy layer of caramelization on top is vitally important. And while you technically can make crème brûlée without a torch, we don’t recommend it. The other options all present their own challenges, whether they’re time-consuming, tricky, or simply harder to control.
A torch, on the other hand, makes things incredibly easy. You just fire it up and move it across the sugar-coated surface of your crème brûlée until the sugar is beautifully caramelized. While most kitchen torches will work for this purpose, some are definitely better suited for this specific task. After we list our picks for the best crème brûlée torches, we’ll dig into why we recommend these over other torches that are better for tasks like searing sous vide proteins.
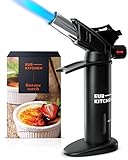
Table of Contents
The Best Crème Brûlée Torches at a Glance
Best for: Serious home cooks or professional chefs looking for lots of features at a great price
Best for: Making large quantities of crème brûlée
Best for: Versatile use on a budget
Best for: Budget buyers
Best for: Those looking for a balance between price and features
Best for: Users wanting a cool double-flame feature
The Top 6 Crème Brûlée Torches
#1. EurKitchen Culinary Cooking Butane Torch
Best for: Serious home cooks or professional chefs looking for lots of features at a great price
As a side note before we begin: this is the torch that I personally use in my home kitchen, so we really mean it when we say that this is our top pick!
The EurKitchen Culinary Cooking Butane Torch is our top pick for its fantastic combination of value and features. We particularly appreciate the fuel gauge; it’s all too easy to get frustrated that a torch isn’t igniting for some reason when in fact the only problem is that you’ve somehow already run out of fuel. (Been there, done that.)
The design and finger guard definitely make safety a priority. Unlike some other torches, this one ensures that your fingers are protected from the flame with a guard between the handle and the flame tube. If you tend to be clumsy or absent minded (or just enthusiastic about safety!), this extra level of protection between your hand and the hot parts of the device is a definite pro. Its safety lock is another great feature.
Finally, we love the ability to create a flame of up to 6” long. Some torches we’ve personally tested can only manage about half that, and it’s a pain to need to get so close to your crème brûlée (or whatever else you’re cooking). A longer flame is definitely easier and more comfortable to work with, so that’s another great selling point for this torch.
If you’re on a budget, you should be aware that there’s a slightly cheaper version available without a gas gauge. However, the price difference is so minimal that we recommend going for the version with the gauge.
#2. Iwatani CB-TC-PRO2 Culinary Butane Torch
Best for: Making large quantities of crème brûlée
Generally, butane torches are refillable, while propane torches attach directly to the cylinder. (We go into much more depth about this below!) This offering from Iwatani is one of the few exceptions: it’s a butane torch that attaches to the fuel can. As a result, it’s fantastic for anyone who tends to cook a lot at once. While other torches may run out of fuel and need to be refilled pretty quickly, this one just keeps going and going and going…
We also love that this particular torch has a stronger-than-average adjustable flame, thanks to being attached directly to the can. This means that while it’s appropriate for crème brûlée on the lower settings, you can use it for more intense purposes on the higher settings. If you’re looking for that kind of versatility, this is a great option!
Be aware that not all butane cans work for this device. You can use Iwatani-brand cans, or any others with the correct notch on the rim. You can order these online in most states (although not in California), or find them at many hardware, camping, or Asian stores.
#3. Butane Torch Kitchen Blow Lighter by FunOwlet

Best for: Versatile use on a budget
Have you ever tried to use your kitchen torch at an unusual angle (to get at the corners of your crème brûlée, for example), only to have the gas flow shut off because it doesn’t work if it’s tilted too far? I have, and it’s really frustrating when you’re trying to just finish off that one stubborn corner!
We at Cuisine Technology agreed that this list absolutely needed to include at least one torch that prioritizes the ability to use it at any angle, and this FunOwlet option fits the bill. In fact, you can even use it upside-down! (We can’t imagine why you would use it upside-down in the kitchen, but at least that means that angling for the edges of things won’t be an issue.)
We also love the price! As one of the most affordable options on our list, the FunOwlet is a great entry-level tool for anyone who’s curious about a crème brûlée torch (or kitchen torch in general). At this price, you can’t go wrong with this one!
Be aware that this torch doesn’t have its own fuel chamber, as many of them do. Instead, it attaches to a butane can, which you’ll need to buy separately. We don’t love this, as it makes the device bulkier, but it’s worth the tradeoff if you prioritize being able to work at versatile angles.
#4. Authenzo Kitchen Butane Torch Lighter
No products found.
Best for: Budget buyers
Here at Cuisine Technology, we’re passionate about the philosophy that gourmet cooking at home shouldn’t be prohibitively expensive. So we’re always thrilled to find great products that fall in line with that philosophy!
The Authenzo Kitchen Butane Torch Lighter is the most affordable on our list, and manages to be a great budget pick without sacrificing quality or function. We also love that it comes with a safety lock and offers an easily adjustable flame level. And given the price, its high-quality and sturdy feel in the hand is a nice surprise.
Of course, other (more expensive) torches on our list offer more features. With that said, if you’re just getting started and want something that works well for an incredibly reasonable price, the Authenzo is a great choice. And honestly, it’s all that many home cooks will ever need.
#5. Spicy Dew Blow Torch
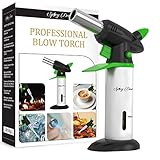
Best for: Those looking for a balance between price and features
If you think you can’t have it all for a reasonable price, think again. The Spicy Dew Blow Torch incorporates many of the features we love about higher-end models without charging a price to match. Of course, there are some tradeoffs, especially that the overall quality isn’t as high and it may feel cheap or flimsy to use.
With that said, we still love the great set of features that this torch offers for a surprisingly low price. It includes a fuel gauge (which we love!), a hand/finger safety guard, a safety lock, and an adjustable flame.
The position of the safety lock on the left side of the device makes this torch potentially less friendly for left-handed users. If you’re a lefty, consider looking for an option that’s not as geared toward right-handed users.
#6. Cadrim Butane Torch

Best for: Users wanting a cool double-flame feature
The Cadrim Butane Torch is a bit of a showstopper thanks to one unique feature: the option of using two flames at once! We love this for its ability to cover more surface area at a time. (Plus it just looks cool.) It’s the only one on our list with this feature, which is fantastic if you tend to want to use it on larger pieces of food. It’s great for large shared crème brûlées instead of individual servings, for example, since the dual flames allow you to cover more of the surface at one time.
If you ever need the precision of just one flame, the Cadrim torch offers that option as well. You can set it to use just one flame instead of two if you prefer. Of course, you can also adjust the flame level.
Be aware that one of the pictures on Amazon (the one using the torch to sear a large piece of beef) is misleading thanks to what appears to be an odd use of Photoshop. The device is much smaller than it looks in that picture; the “How to Use” series of photos will give you a better sense of its actual size.
What Is a Crème Brûlée Torch? And Why You Need One
A kitchen torch is a handheld device that uses fuel (typically either butane or propane) to create a flame. You then use this flame to sear, char, or caramelize food. (Depending on your hobbies, you may find it’s useful outside of the kitchen as well!) Crème brûlée is one of the most common and popular uses, but they’re also great for meringues, sous vide food, and much more.
Once you have one, you’ll find yourself discovering all sorts of uses for it! From finishing off meringue to charring vegetables to searing meats, these torches offer you the chance to be delightfully creative in your cooking.
The Different Types of Kitchen Torch
There are two main kinds of kitchen torch: those that use butane, and those that use propane.
In general (with some exceptions), butane torches:
- Create a smaller, more manageable flame
- Don’t attach to a gas can, instead being refillable with fuel
- Are lighter, smaller, and easier to hold and maneuver
- Are more affordable
And in general (with some exceptions), propane torches:
- Create a larger, more powerful flame
- Attach to a fuel can
- Are larger and heavier, and can be unwieldy if you’re not used to them
- Are more expensive
For crème brûlée, we absolutely recommend a butane torch. They’re typically smaller and less bulky, making them easier to maneuver and use freely. If all you plan to do with your torch is prepare crème brûlées or other similarly small dishes, this is all you’ll ever need.
All of the options we’ve listed above are butane torches, so they’ll all be appropriate for this kind of basic household use! Our top pick is the EurKitchen Culinary Cooking Butane Torch, which does a fantastic job of balancing quality, included features, and price. (I personally use this specific torch in my home kitchen, so I really mean it when I say it’s our top pick.)
If you want a more powerful torch, we recommend going for a propane option instead. You can read our take on several of those on our list of the best sous vide torches.
The Benefits of Using a Torch for Crème Brûlée
- Lets you easily use a tool specifically designed for tasks like this. No more burning your thumb as you try to use a lighter, or trying to get a spoon to the right temperature to caramelize the surface of your crème brûlée.
- Creates an evenly caramelized surface. With makeshift methods like a hot spoon, it can be easy to accidentally over-caramelize some areas while leaving others unfinished. The flame of a torch makes it a lot easier to get a consistently brûléed surface.
- Lowers the risk of burning. This may sound counterintuitive, since you’re applying a flame to your food. However, many people who don’t have a crème brûlée torch use their oven’s broiler instead. And we all know how easy it is to go from “undercooked” to “charred and inedible” in a matter of seconds in the broiler! With a torch, you’re keeping a constant eye on your food, so there’s very little risk of burning if you’re paying attention.
3 Things to Look For in a Good Torch
- A comfortable fit in your hand. A torch that’s uncomfortable to hold or operate makes it a lot harder to use it for as long as necessary. (If you’re left-handed, particularly pay attention to the design of the torch; some are clearly designed for right-handed users and put buttons in places that are awkward for left-handed users.)
- An adjustable flame. Sometimes you just want a whisper of heat across a surface. Other times, you really want to blast something with fire to give it a nice char. A torch with adjustable heat will let you do both.
- Safety features. We appreciate torches that have a safety lock, a wide and stable base, and a finger/hand guard to ensure you don’t burn yourself. After all, you are handling a device that’s spewing fire.
5 Tips for Using a Crème Brûlée Torch
- Make sure your crème brûlée is chilled before you add the sugar and torch it. This makes a huge difference in the final product, so don’t try to cheat by skipping this step.
- Keep the torch moving. It’s easy to think that the torch isn’t doing much, and to hold it in one place for a while… only to end up burning or unintentionally charring that area. We recommend keeping it moving over the surface of the crème brûlée (or other food) in slow, steady sweeps.
- Don’t use a super high flame. Most of the torches on our list are appropriate for crème brûlée even at their higher settings, but a couple may be too powerful on the high end. Start small and work your way up if necessary. There’s no need to blast your crème brûlée with a huge flame!
- Don’t be afraid to get the torch up close to the food. A common mistake we’ve seen with first-time torch users is a reluctance to actually let the fire from the torch touch the food. You can ease into it and start further away, but don’t be scared to bring the torch close to the food if it’s not having the desired effect.
- Have a fire extinguisher nearby! These kitchen torches are straightforward and simple to use, and none of the team here at Cuisine Technology has ever had any incident with one. But any time you’re using fire like this, it’s better to be safe than sorry, so keep a fire extinguisher handy just in case.
How to Make Crème Brûlée With a Torch
One of the best things about crème brûlée is that it seems fancy and complex, but it’s actually pretty straightforward! If you follow a good recipe precisely, it’s actually pretty hard to mess it up. But there are definitely a few things you can do wrong, so here are our basic steps for making crème brûlée using a kitchen torch!
Keep in mind that while you can prepare the base of your crème brûlées in advance, the final torching process should be done very shortly before serving them. Allow yourself a couple minutes to torch each crème brûlée, and then a few more minutes for them to cool before serving. Don’t try to hold them for longer than that. (If you need to prepare the base in advance, that’s fine; just don’t do the torching until it’s almost time to serve them!)
- Prepare the crème brûlée base according to the recipe you’ve chosen. This means mixing, straining, and baking the base as instructed in the recipe.
- Thoroughly chill the finished crème brûlée. Some recipes call for chilling it for just half an hour or less, but we find that torched crème brûlée works out much better when it’s completely chilled. Ideally, this means refrigerating it overnight.
- Dry the crème brûlée. This will help ensure a quicker and more even caramelized layer on top once you torch it. We just use a paper towel to gently pat the top of the desserts and remove any excess moisture.
- Sprinkle the crème brûlée with sugar. How much you use depends on the size of your containers, of course! But as a general rule, you want a layer that’s complete and even without being thicker than necessary. You can achieve this by covering the surface with a big more sugar than you’ll need, then turning the ramekin (or other container) to spread the sugar across the entire surface of the dessert. Pour out any excess; the right amount of sugar should stick to the surface.
- Light up the torch. Don’t do this while pointing it at the desserts, as the flame may be more intense than you expect. Adjust it to an appropriate level. (Note: if you’re using your torch for the first time, or it ran low on fuel last time you used it, you’ll need to fill it before you light it up.)
- Torch the crème brûlées! Working one at a time, slowly and steadily move the flame from the torch back and forth over the entire surface of the dessert. As the top starts to caramelize, you’ll be able to see which areas are finishing faster and which need more attention. Don’t forget the edges and corners!
- Allow the crème brûlées to cool. Again, don’t skip this important step! This is when the beautiful caramelization you’ve created will harden and become that delightfully crackable layer we all know and love. You can either let them cool at room temperature or put them in the refrigerator. Either way, plan to serve them within about 30 minutes.
Conclusion
While they might seem fancy, basic kitchen torches are actually surprisingly affordable. This is particularly true of butane torches, which are our recommendation for crème brûlée and similar uses. If you’re not sure where to start, we love (and personally use) the EurKitchen Culinary Cooking Butane Torch, which offers a great balance of features for value.