IMPORTANT NOTE: We recommend beginning this recipe the day before you want to eat it. That gives you time to cool the chicken thighs in the refrigerator overnight, which means they won’t overcook when you sear them to achieve that crispy skin.
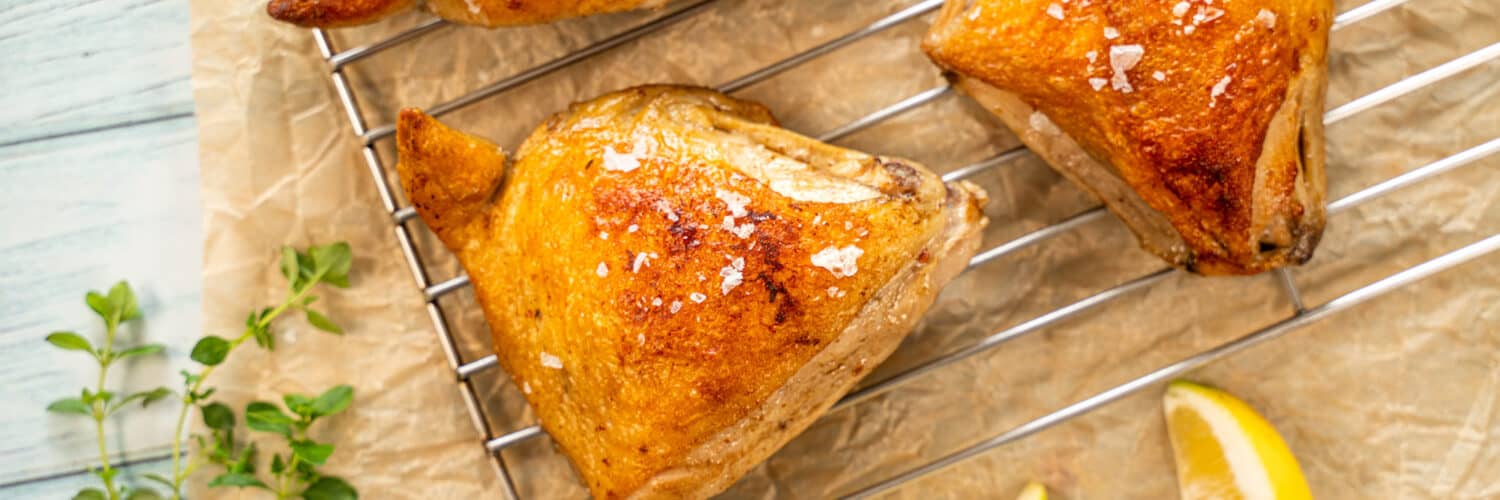
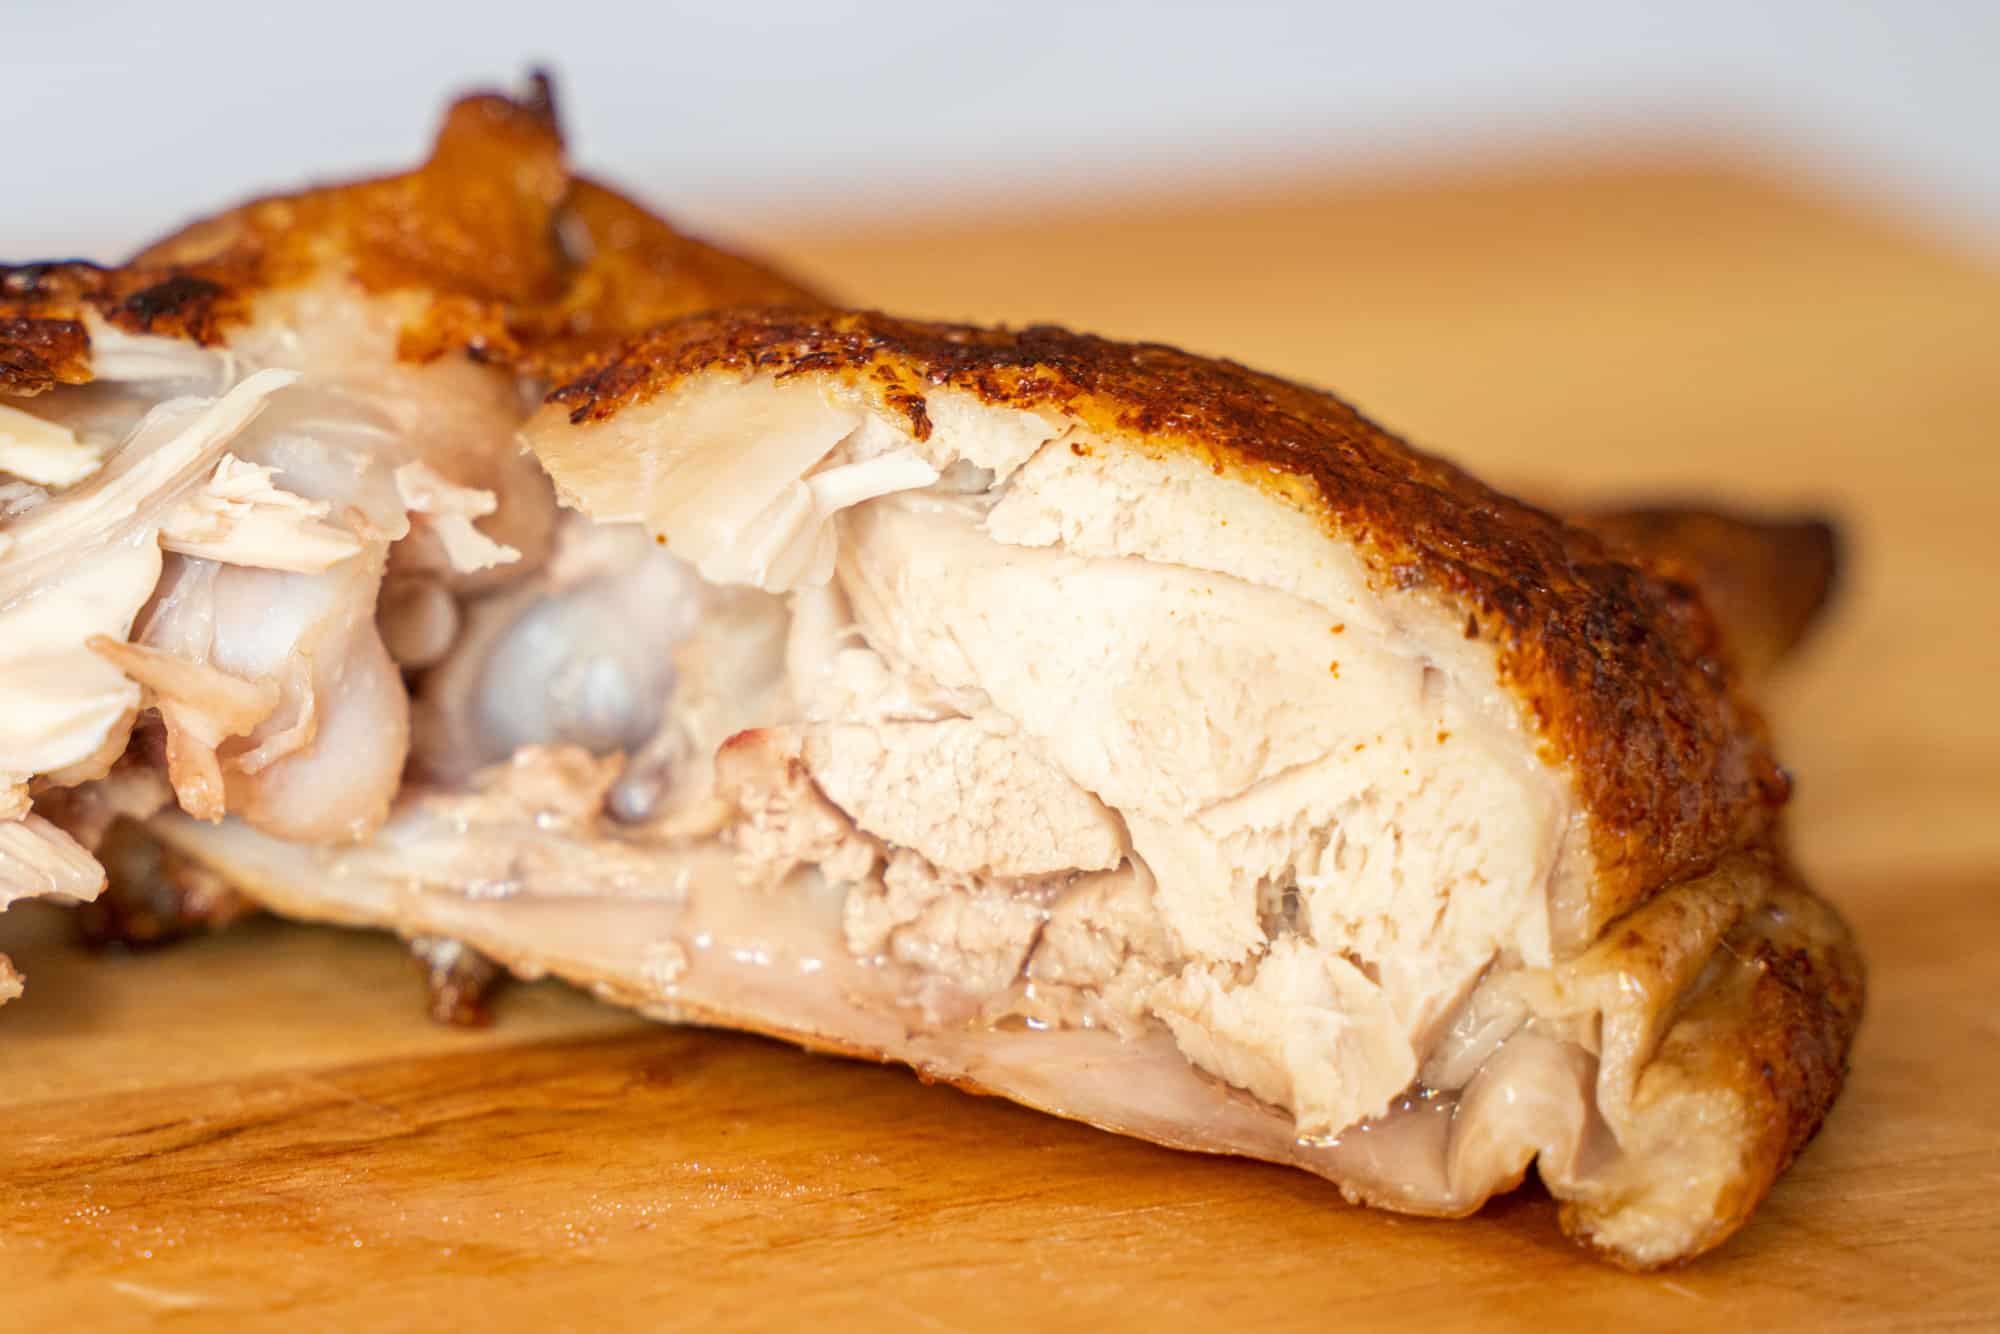
Chicken thighs are juicy, tender, and flavorful almost regardless of how you cook them—at least compared to the breast, which can dry out quickly. Sous vide chicken thighs, though, take things to another level. They’re delicious, rich, and so juicy they’ll drip down your fingers. The biggest challenge is getting the skin nice and crispy, but follow our guide and you’ll master that part too.
While you can skip straight to the recipe if you’d like, the notes are all full of extra information and tips to help you make the perfect sous vide chicken thighs. (No stories about eating grandma’s chicken soup on autumn days here!)
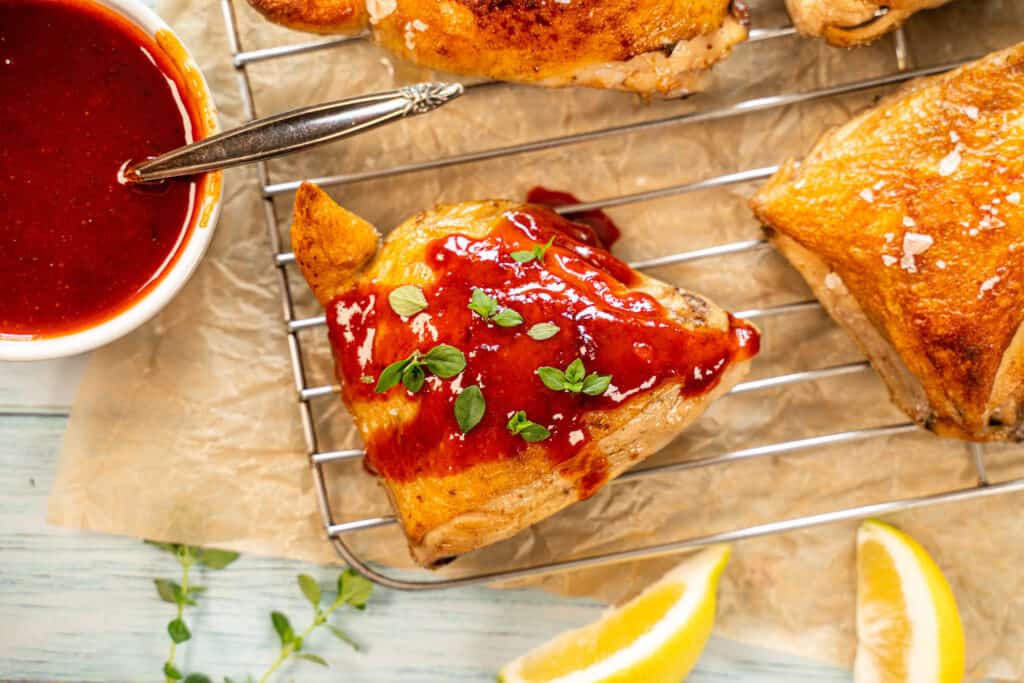
Table of Contents
Notes on the Ingredients
Chicken:
Bone-in thighs have better flavor, and tend to be easier to find with skin on. However, you can make this recipe with boneless thighs if you prefer. The only difference is that you can optionally reduce the cooking time by about half an hour.
You can also make this recipe with skinless thighs. Because the point of searing the thighs is to crisp up the chicken skin, using skinless thighs means you can skip the searing step. As a result, you can eat the thighs right away straight out of the sous vide bath instead of cooling them and then searing them.
Butter:
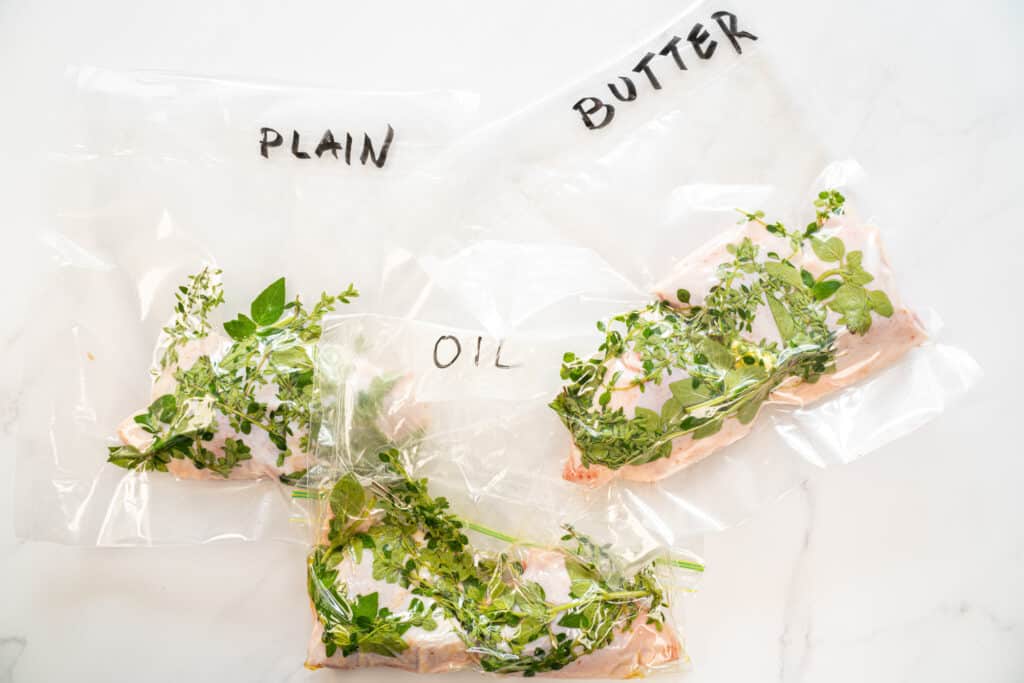
You don’t need to use butter in this recipe if you don’t want to, but we find that it gives a slightly better result than cooking the thighs plain or with oil. For more information about our side-by-side comparison, see the “Cooking With Butter, Oil, or Plain” section.
Using unsalted butter gives you more control, because you can add the salt separately. If you use salted butter, you may find that the final result is too salty. If you only have salted butter, reduce the amount of extra salt you use accordingly.
Salt:
The quantity you use depends completely on your preference, but it’s not as if you can taste as you go with raw poultry. As a baseline, use a minimum of around 1/8 teaspoon of salt per thigh, and add more if you tend to prefer your food saltier.
Oil:
While you won’t use a super-hot pan, we still recommend using an oil that has a high smoke point to be on the safe side. Some good options include avocado oil, safflower oil, ghee, sunflower oil, and extra-light olive oil. The thighs pictured here were seared in ghee.
How Long to Sous Vide Chicken Thighs
At around for to six hours, you can expect to begin seeing changes in the chicken’s texture. You can absolutely cook it for longer, but we’ve found that 1 1/2 to 3 hours is the sweet spot at 165° F (74° C). This results in thighs that are tender and juicy without feeling like they’re bordering on mushy.
Achieving Crispy Skin on Sous Vide Chicken Thighs
Getting crispy skin in this recipe is easy: you simply pat the chicken thighs dry, then sear them in a pan with some hot oil.
The complication, however, is that doing this immediately after cooking your chicken, while it’s still hot from the sous vide bath, will result in overcooked thighs. This defeats the purpose of sous vide cooking, and therefore we don’t recommend it.
Instead, it’s best to make your thighs a day in advance. Put them in the refrigerator overnight to cool them, then sear them the next day. This will achieve that nice crispy skin without overcooking the meat. Turning them over to the bottom briefly will help heat them through.
Another option is to cool the thighs quickly using an ice bath. This achieves the same thing as refrigerating them overnight. It cools them enough that you can then sear them without overcooking the meat.
Scaling the Recipe
Feel free to halve, double, triple, etc. this recipe—there’s no need to make changes as you scale it up or down. You don’t need to be super precise with the quantities, so feel free to round up or down if you end up with an awkward amount of butter or oil when you scale the recipe.
The only major point to keep in mind when scaling the recipe is that your chicken thighs should be in a single layer in the sous vide bag. Depending on how many thighs you want to cook, this may mean you need to use multiple bags.
Cooking With Butter, Oil, or Plain
We performed a side-by-side comparison of sous vide chicken thighs cooked with butter, with olive oil, or without any added fat. All three tests were done in the same sous vide bath to ensure exactly equal cooking, then seared in the same pan at the same time.
THE RESULTS:
All three types of chicken thighs were delicious, tender, and crispy-skinned. Multiple testers agreed that they would happily eat any of them, and that all three were better than traditionally cooked thighs. However, there were slight differences between the three styles. In short, the chicken thighs with butter won the taste test.
- The plain chicken thighs were flavorful and tender, with a little bit of the shreddable, fibrous texture typical to chicken. Of the three experiments, it had the most chew and the most standard chicken texture. It also tasted a little drier than the other two.
- The chicken thighs with oil had an almost silky texture. They were still recognizably chicken, of course, but the meat was remarkably smooth and tender. These were a clear winner over the plain chicken thighs due to the improved texture.
- Finally, the chicken thighs with butter had that same velvety smoothness of the ones with oil, but with an added richness. The difference between the butter and oil thighs was minimal, but butter took a slight edge.
Ideal Temperature for Sous Vide Chicken Thighs
Our recipe calls for a 165° F water bath, which results in an incredibly tender, juicy thigh that still has some of the familiar texture and chew of traditional chicken. This is my personal favorite, because I find that sous vide chicken at lower temperatures can actually become so tender that it feels almost artificial. This is especially true of dark meat like thighs, since they’re naturally more tender than breasts to begin with.
As a side note: I suspect that The French Laundry cooks their chicken in a sous vide bath in the low 140°s F, and while the result was easily the most tender, melt-in-your-mouth chicken I’ve ever had, it was almost too soft.
If you prefer an even more tender result, you can cook your chicken thighs at a lower temperature. (Yes, even though you’ve always heard that nothing below 165° F is safe!) However, this absolutely requires that you carefully follow the temperature and time guidelines provided by the USDA. The “Sous Vide Chicken Safety” section below goes into more detail. Importantly, remember that the timer for your target temperature starts when the meat reaches that temperature internally, not when you put the chicken into the sous vide bath. To ensure you’re at a safe temperature, use a sous vide thermometer.
If you choose to cook lower than 165° F, I recommend trying a temperature in the mid to upper 140°s F (between 144° F and 148° F). This creates an astonishingly tender chicken thigh that (in my opinion) has better texture than one in the lower 140°s F. Keep in mind that you may need to extend the sous vide cook time to ensure you’ve held the chicken at the target temperature for long enough.
Sous Vide Chicken Safety
Sous vide allows you to cook chicken to lower temperatures than would be safe otherwise, because of the extended cooking times.
You’re probably familiar with the rule of thumb that chicken should be cooked to an internal temperature 165° F (74° C) to avoid salmonella poisoning. That rule works great as a simple answer to chicken safety, because at this temperature, chicken instantly achieves a safe “7-Log reduction of Salmonella.”
Note: if you’re cooking your sous vide chicken thighs to 165° F (74° C) for over an hour as our recipe calls for, you can skip the rest of this section, since you’ll be cooking your chicken up to the USDA’s safe temperature.
However, that’s only part of the story. A more in-depth answer is that achieving this 7-Log reduction is a combination of both time and temperature, which means that it’s possible to cook chicken safely at lower temperatures. For example, if you hold chicken at an internal temperature of 155° F, it will achieve that safe 7-Log reduction in just under a minute. At 150° F, it takes a bit under four and a half minutes. For your convenience, we’ve created a simplified chart of safe times and temperatures based on the information provided by the United States Department of Agriculture (USDA).
Keep in mind that all of these temperatures are internal (not just on the surface of the chicken thigh), and begin from the time the chicken reaches that temperature all the way throughout. In other words, start the timer from when your chicken thigh reaches that temperature internally, not from when you first put it into the sous vide bath.
To check the chicken’s internal temperature, use a sous vide thermometer in the thickest part of the thigh, but not touching bone. Once it reaches your target temperature, start a timer for the corresponding amount of time.
While other sites, including Serious Eats, use an estimate of chicken with a 5% fat content, this table uses an estimate of 12%—the highest option listed by the USDA and requiring longer cook times to ensure safety. The times in this chart are therefore slightly longer than you might find suggested elsewhere, but we prefer to err on the side of caution.
Times and temperatures for 7-Log reduction of Salmonella risk in products
This simplified chart explains the amount of time chicken needs to be held at various temperatures to ensure a 7-Log reduction in Salmonella according to the USDA. This assumes a 12% fat rate, which takes the longest time. Remember that these are the times the chicken must be held at or above the temperature listed, not the total cooking time.
| Temperature | Time Held at Target Temperature |
| 140 °F | 35 min |
| 145 °F | 13 min |
| 150 °F | 4.2 min |
| 155 °F | 54.4 sec |
| 160 °F | 16.9 sec |
| 165 °F | 0 sec |
References and resources for more information about safety in sous vide chicken:
United States Department of Agriculture (USDA): FSIS Cooking Guideline for Meat and Poultry Products (Revised Appendix A) December, 2021 (see page 37 in particular)
United States Department of Agriculture (USDA): Cooking Meat? Check the New Recommended Temperatures
Sous Vide Chicken Thighs FAQ
Can you overcook chicken thighs in sous vide?
Technically no—your chicken thighs will never get hotter than the water bath around them, no matter how long you leave them there. However, the texture eventually starts to degrade, which is the sous vide equivalent of overcooking. To avoid this, we recommend keeping your cook time to under 4 to 6 hours.
How long do you cook chicken thighs in a sous vide?
We recommend a cook time of 2 to 3 hours for bone-in chicken thighs, or 1 1/2 to 2 1/2 hours for boneless thighs. The texture begins to change for the worse around the 4-hour mark.
Is sous vide chicken safe?
Yes—as long as you follow the USDA’s requirements for time and temperature! Keep in mind that this is the internal temperature, so the clock starts when the center of the chicken meat reaches this temperature, not immediately when you put it in the sous vide bath.
You can find a more detailed discussion in the “Sous Vide Chicken Safety” section above, along with a chart detailing the minimum cook times at each temperature for chicken safety.
Can you sous vide frozen chicken thighs?
Absolutely! Add an hour to the cook time to compensate for the colder beginning temperature. Frozen bone-in chicken thighs should take 3 to 4 hours, while frozen boneless chicken thighs will take 2 1/2 to 3 1/2 hours.
Step By Step Information
1. Preheat your sous vide bath.
We recommend cooking your chicken thighs at 165° F (74° C), but because food safety is a result of both temperature and time, you can actually cook them to a lower temperature if you prefer. See the “Sous Vide Chicken Safety” section above for more information and a chart detailing how long chicken’s internal temperature needs to be at a certain point for a 7-Log reduction in salmonella.
2. Season and bag your chicken thighs with any add-ins you choose.
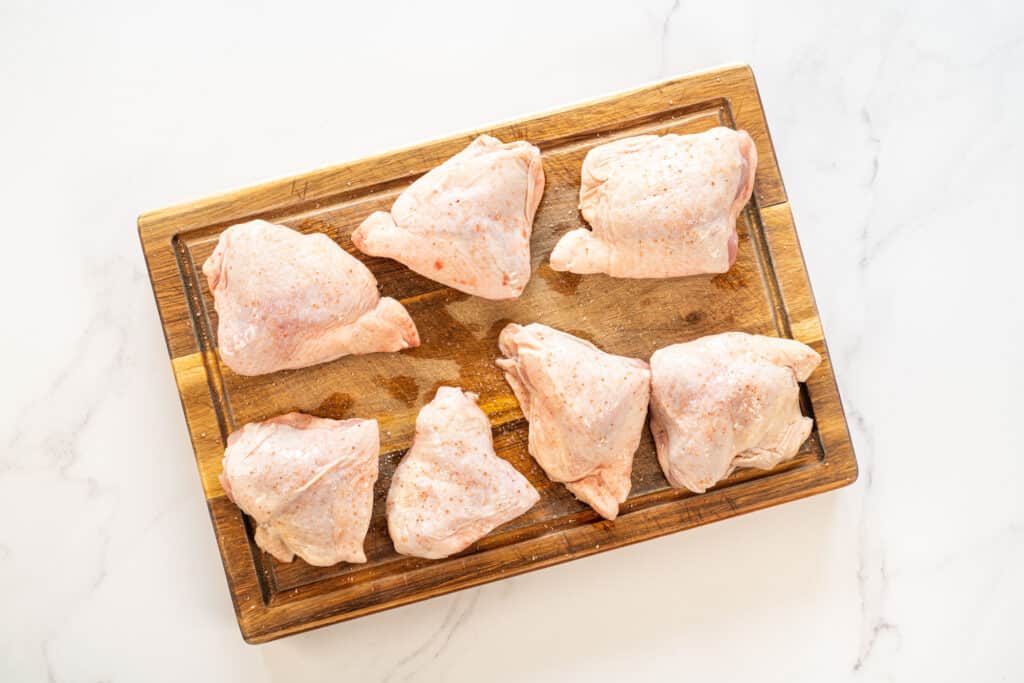
The amount of salt you use depends on your personal taste. As a bare minimum, we recommend 1/8 teaspoon of salt per thigh, but most people will likely prefer more. Keep in mind that much of the salt will essentially wash off in the chicken’s juices as it cooks.
Your chicken thighs need to be in a single layer in the sous vide bag. If necessary, use multiple bags.
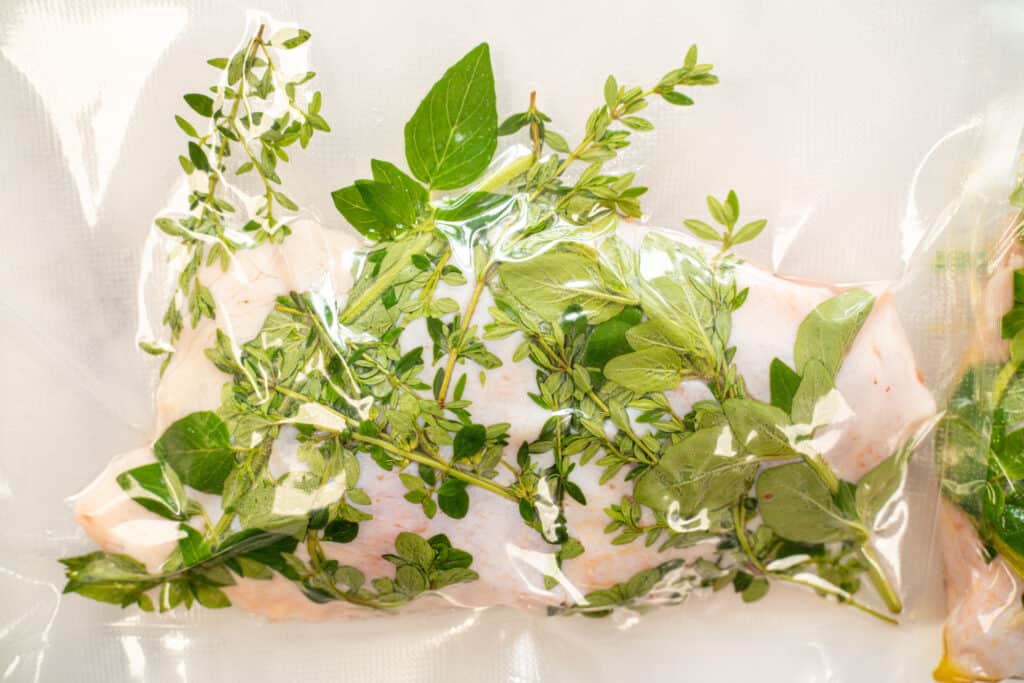
This is your chance to be creative! Put in whatever culinary add-ins and aromatics you think you’d enjoy. The pictures here used thyme, oregano, and marjoram, but this recipe also works really well with sumac and preserved lemons, or rosemary and sage. You could try a Thai-inspired version with lemongrass and birdseye chili, or a California-Mexican-inspired variation with cumin, adobo sauce, and cilantro.
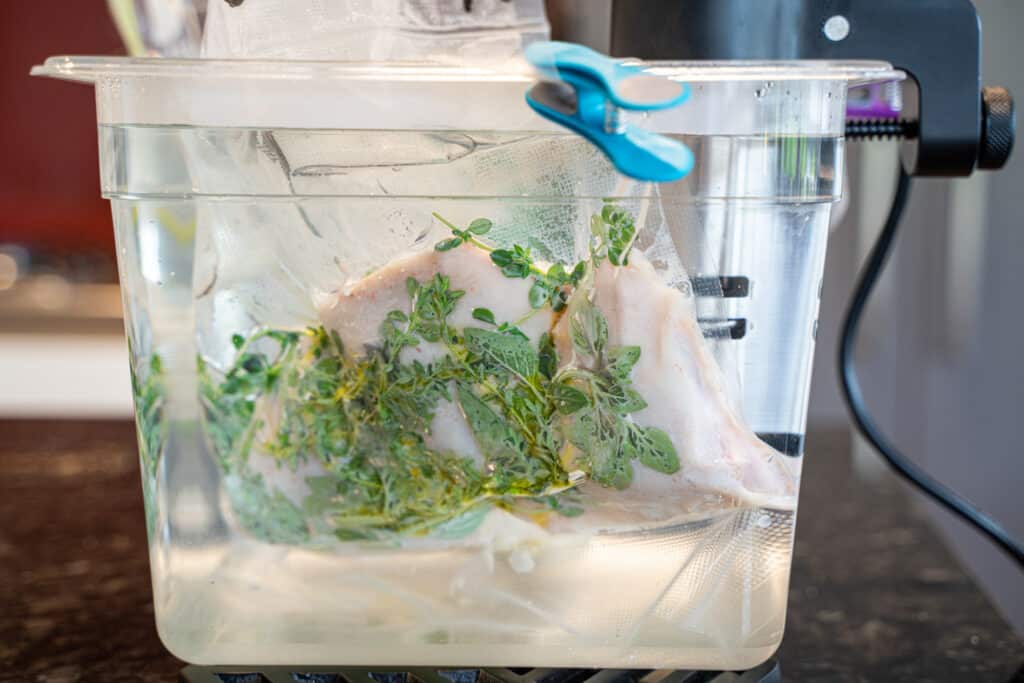
3. Seal the bag.
If you have a vacuum sealer and appropriate bags, this recipe is a great time to use them. Keep in mind, though, that suction vacuum sealers won’t work well if you have liquids (such as oils or sauces) in the bag with your chicken thighs, because they’ll suck the liquids out. If you have a chamber vacuum sealer, this won’t be an issue, as those are designed to keep liquids in the bags.
If you don’t have a vacuum sealer, use the water displacement method to remove as much air as possible from the bag. You’ll likely still have some small air bubbles, but these should float up to the part of the bag above the water during the cooking process.
4. Cook the chicken thighs.
For bone-in chicken thighs, we recommend a cook time of 2 to 3 hours.
For boneless chicken thighs, reduce the time by half an hour to 1 1/2 to 2 1/2 hours.
Because this is sous vide cooking, you absolutely won’t run into major problems if you go a bit over on these times. However, we find that beyond this point, the chicken actually starts to get too tender and soft, losing some of the texture that makes it enjoyable to eat.
5. Chill the chicken thighs.
If you have skinless chicken thighs, you can skip this step and everything past it, and just eat them right away.
The purpose of chilling the thighs is to bring down the temperature so they don’t overcook when you sear them to get a crispy skin. If you go straight from the sous vide bath to searing, the already-hot chicken thighs will get even hotter in the pan, and end up overcooking. This essentially ruins all the work you’ve done with the sous vide process to cook them to a specific gentle temperature.
If you’re in a hurry, you can cool down the thighs in a sous vide ice bath. If you have time, just refrigerate them overnight. Either way, it’s easiest to just leave them in the bag you cooked them in.


6. Clean up the thighs.
Remove and discard any large aromatics, such as sprigs of herbs or entire chunks of spices.
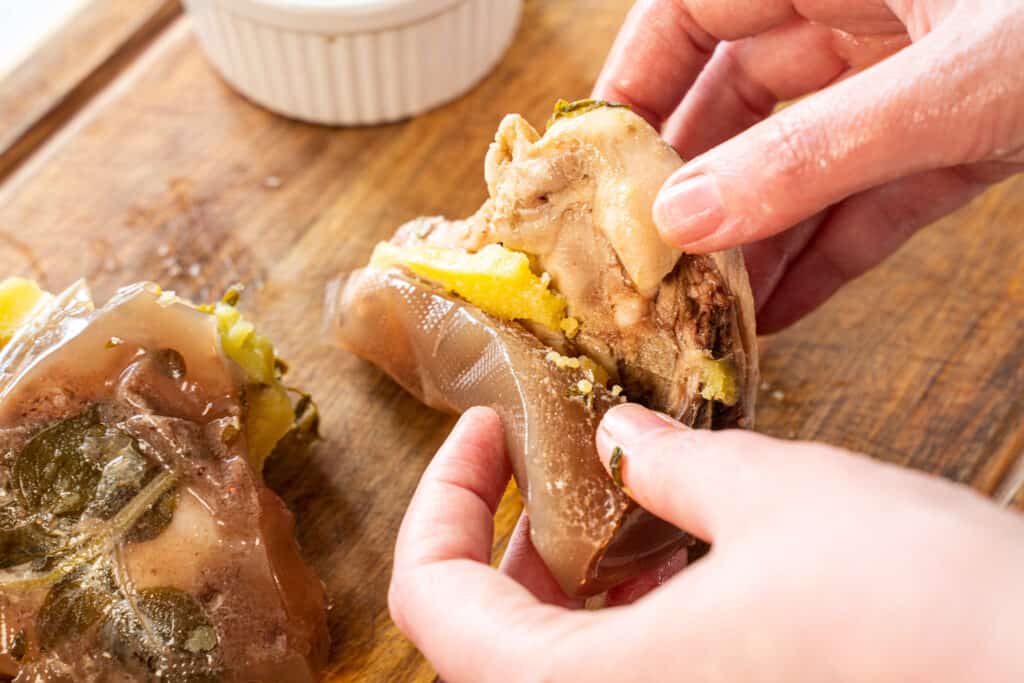
You should find that the chicken’s juices have gelatinized as the thighs cooled. You’ll also end up with chunks of re-solidified butter. Keep all of this! It’s full of flavor, and you can use it to make a delicious sauce or as the base for a soup.
Pat the skin-side of the thighs dry with a paper towel. You can wipe gently, but rubbing too hard tends to rip the skin.

7. Heat a pan and cook the thighs.
If you have a cast iron skillet, it’s ideal for this step! We tested multiple pans for this recipe and found that a large cast iron skillet worked best. If you don’t have the right cast iron pan, a nonstick pan works too.
Select a large pan. You’ll need to ensure that there’s room between the thighs so they sear rather than steam.
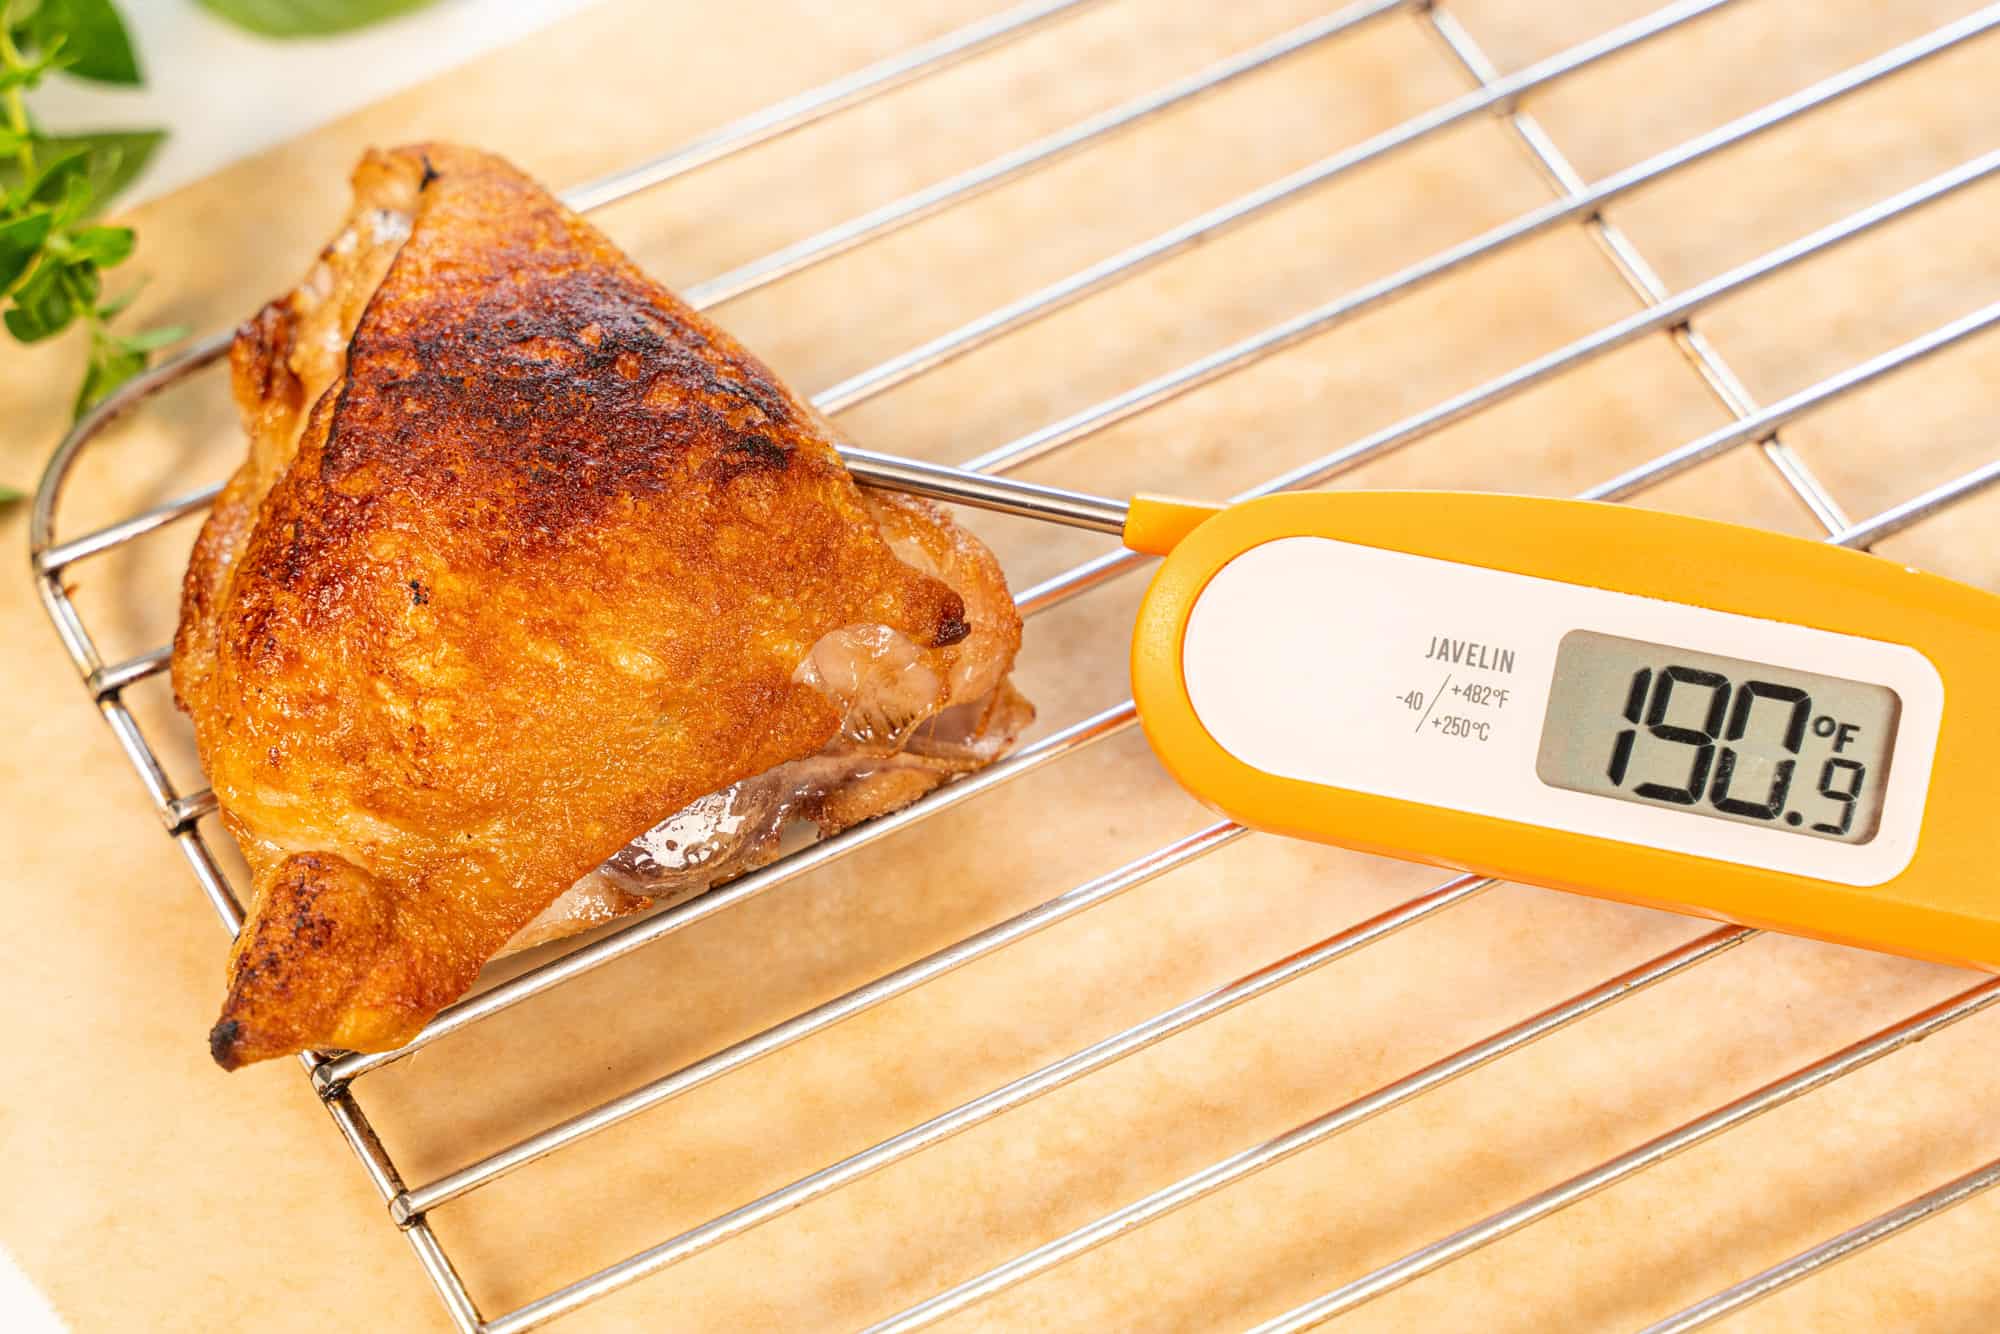
Heat the pan with the oil in it over high heat, then carefully add the thighs, skin side down. Cook until the skin gets golden-brown and crispy, about 3 to 4 minutes (but check regularly!). Use tongs to tilt the thighs to different angles so you sear their corners and edges too for as much crispy skin as possible!
Once the skin is cooked to your satisfaction, turn the thighs over so the skin side is up. Cook for around 1 1/2 to 2 minutes to heat through. The internal temperature of the thighs shouldn’t end up getting above 150° F or so, which is cooler than the temperature of the recommended sous vide bath. In other words, you’re able to sear the thighs without overcooking them.
Finally, flip the thighs back to being skin-side-down for just 10 to 15 seconds. This quick second sear on the skin makes it even crispier than it was to begin with.
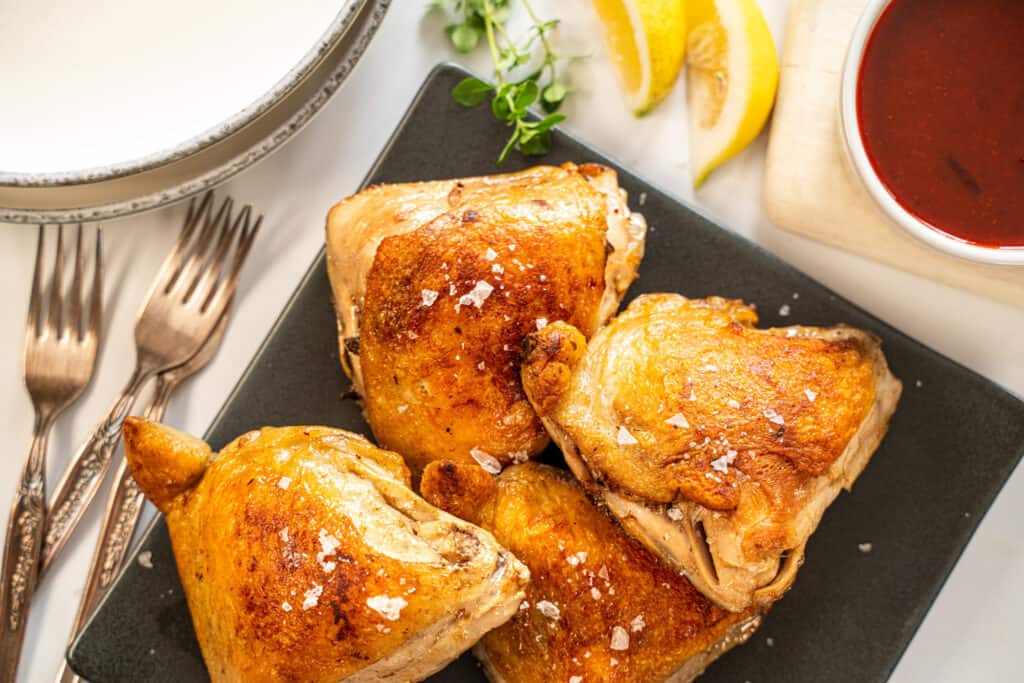
8. Serve and enjoy!
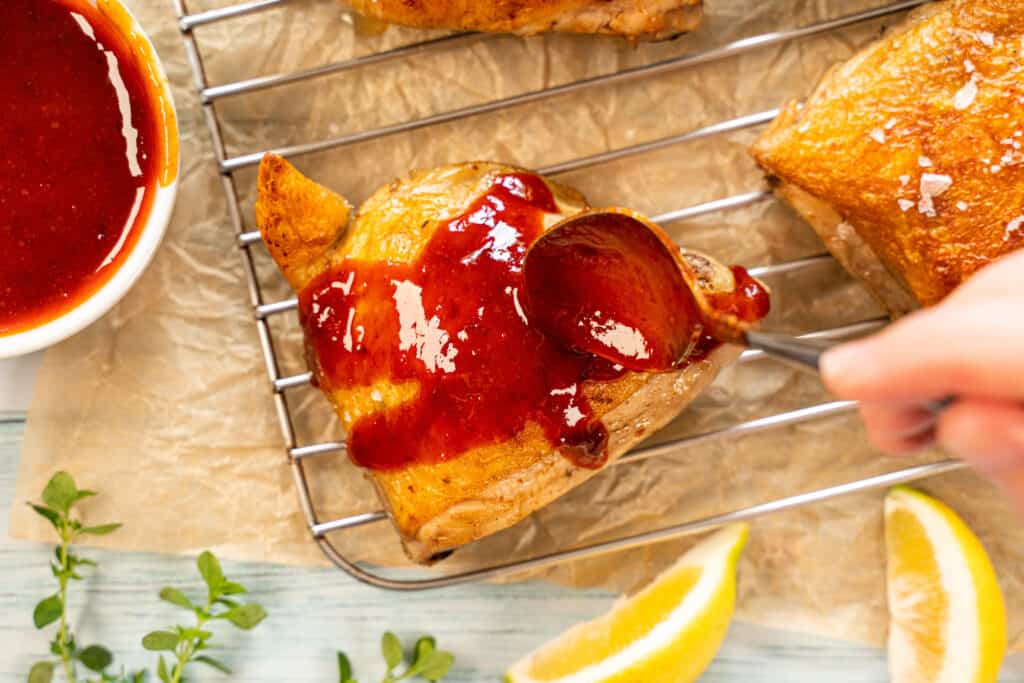
These crispy-skinned sous vide chicken thighs are so tender, flavorful, and delicious that you don’t need all sorts of fancy additions; they’re more than capable of standing on their own. But more is always better, right? Feel free to serve them along with your favorite sauce! The sauce pictured here is a quick, simple Korean-inspired one that uses 1 part gochujang to 3 parts plum syrup. The thighs in the pictures are also sprinkled with Maldon sea salt.

Sous Vide Chicken Thighs
Equipment
- Sous Vide Circulator
Ingredients
- 4 chicken thighs
- 1/2 tsp salt or more
- 1 tbsp butter
- aromatics optional*
- 2 tbsp oil with high smoke point**
Instructions
- Preheat your sous vide water bath to 165° F (74° C).
- Sprinkle the chicken thighs with salt to taste. Put them into a sous-vide-appropriate bag in a single layer (use multiple bags if necessary). Add the butter and any aromatics you choose. Seal the bag with a vacuum sealer or using the water displacement method.
- When the water reaches the target temperature, put the bag in. Cook for 2 to 3 hours for bone-in chicken thighs, or 1 1/2 to 2 1/2 hours thighs.
- Chill the chicken thighs (still in the bag). You can either put them in an ice bath or refrigerate them overnight.
- Clean up the thighs. Remove and discard any large aromatics, such as sprigs of herbs. Pull off and set aside any gelatin or hardened butter. Pat the skin side dry with a paper towel.
- Heat a pan on medium-high heat with the 2 tablespoons of oil in it. When it’s hot, put in the thighs skin-side down and sear until the skin is beautifully crispy and golden-brown, about 3 to 4 minutes. Turn the thighs over and cook skin-side up to warm through, about 1 1/2 to 2 minutes.
- Finally, flip back to the skin side for 10-15 seconds to re-crisp.
- Serve and enjoy!


