This page may contain affiliate links. If you make a purchase through one of these links, we may earn a commission at no extra cost to you.
Sous vide literally translates to “under vacuum,” as you’ll know if you’ve read our piece on the pronunciation and meaning of the term “sous vide.”
But despite the name, you absolutely do not need a vacuum sealer to use the sous vide method at home.
Instead, the trick is to use the water displacement method. This effectively removes most of the air from your plastic bags, and doesn’t require anything other than a container large enough to hold enough water to submerge the bag and your hands with some room to maneuver.
Read on to learn exactly how to perform the water displacement method in this step-by-step guide with pictures.
Table of Contents
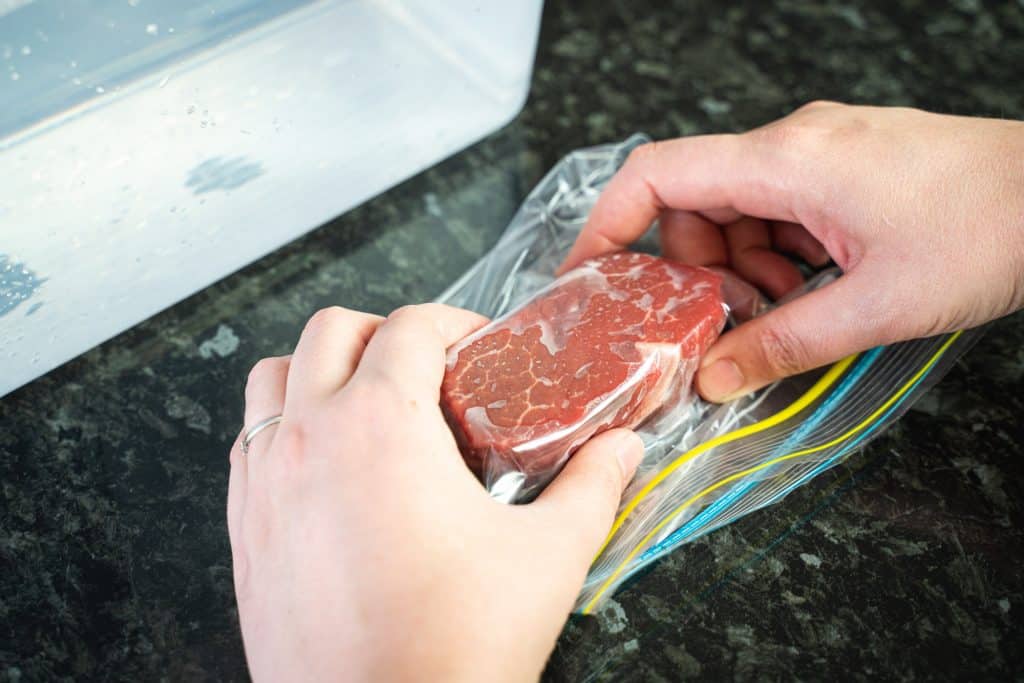
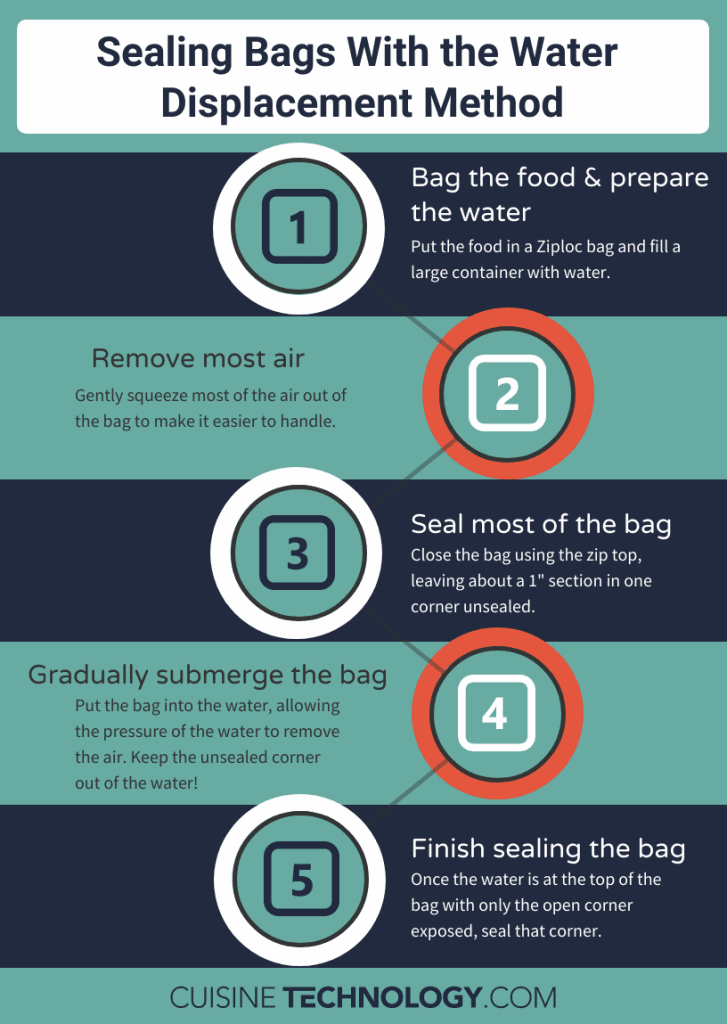
Step 1: Place the Food Into a Resealable Bag and Prepare Your Water Bath

This is pretty straightforward. Simply put the food you want to cook into your bag, ensuring that there’s plenty of room and that the bag can close easily. It shouldn’t be so full that it needs to stretch or strain to close.
As you put the food into the bag, place it at the bottom of the bag so there aren’t any large air pockets under it. (Depending on the shape and texture of the food, this may not be entirely possible, but do your best.)
Fill a container large enough to fit the bag of food and your hands with enough water to fully submerge the bag (but don’t put the bag in yet!). This can be the same container that you’ll use to sous vide your food, but do not heat the water yet! You’ll need to put your hands into the water in a moment, so it shouldn’t be hot enough to hurt you.
Step 2: Squeeze Most of the Air From the Bag
Without crushing or smashing your food, squeeze most of the air out of the bag. This step is technically optional, because the water displacement method will remove the air anyway, but I find it’s easier to get most of the air out sooner.
Step 3: Seal the Bag Most of the Way
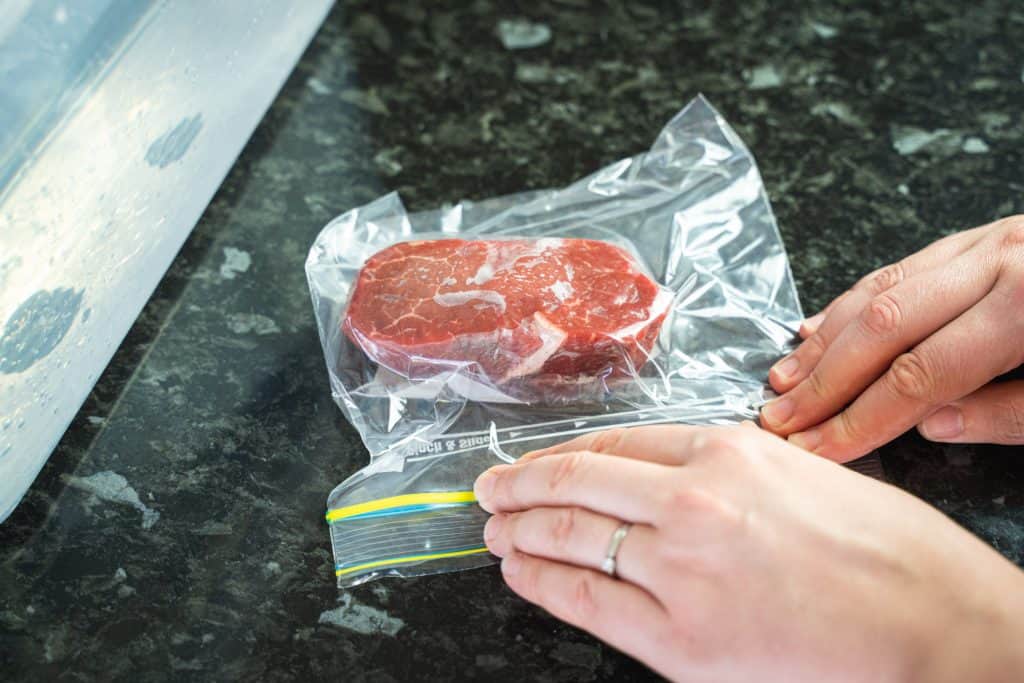
Zip the bag mostly shut, leaving one corner open for about an inch. Sealing it most of the way prevents much air from getting back in, while the open corner will allow the remaining air to escape.
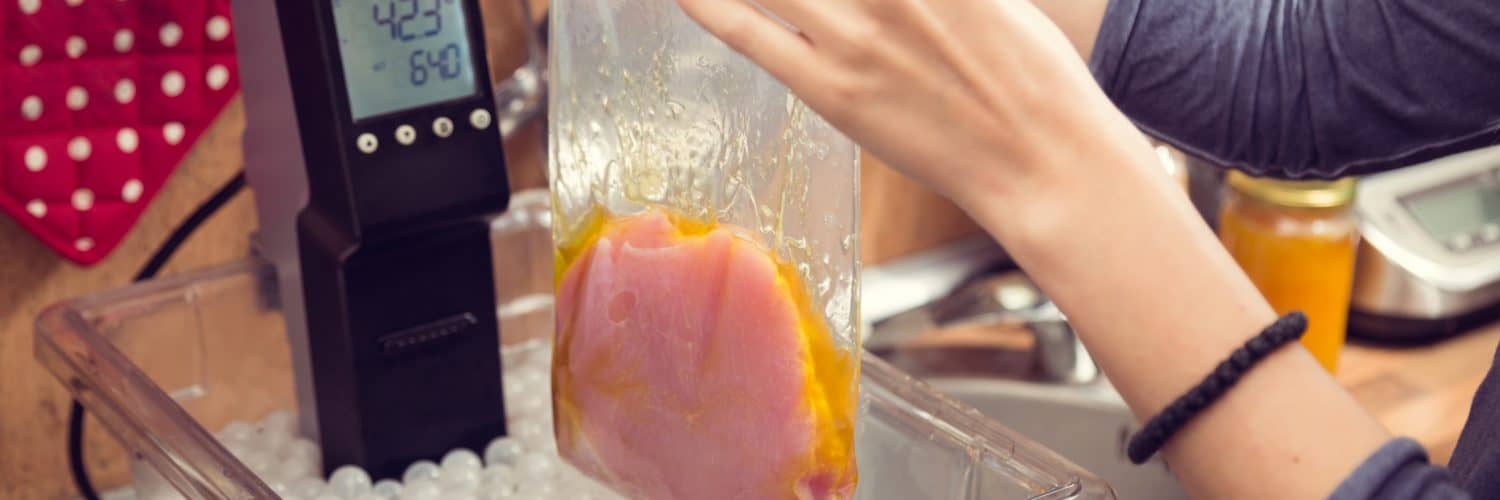
Step 4: Immerse the Bag in Water (Gradually!)
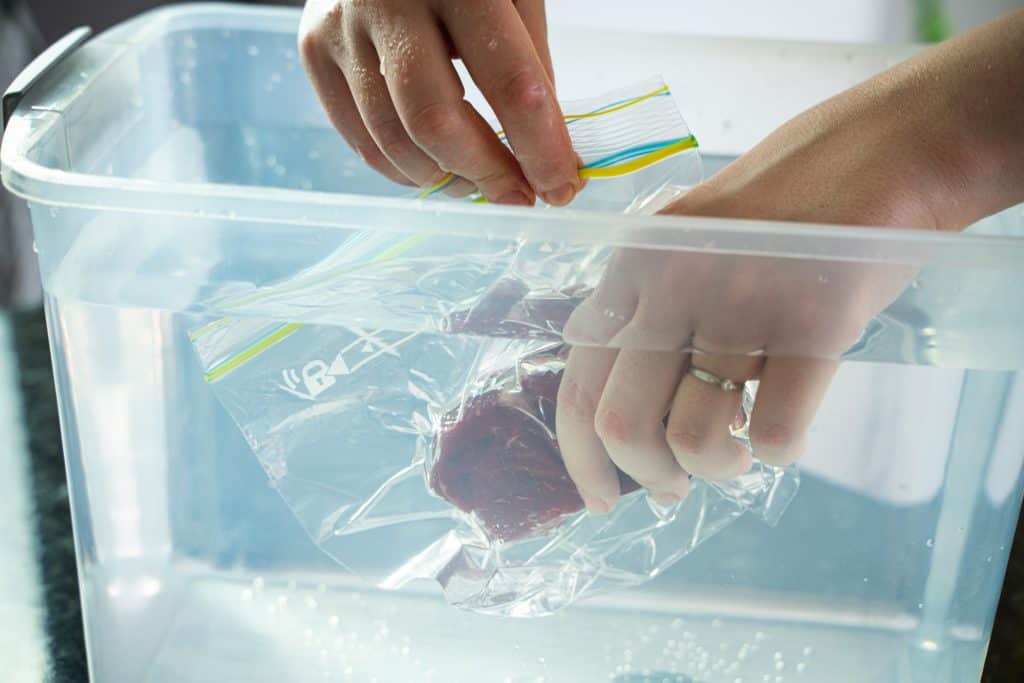
Lower the bag into the water, starting with the bottom. DO NOT fully submerge the bag, as this will allow water to leak in through the open section. Instead, keep the unsealed corner of the bag out of the water as you lower it in.
As you lower the bag into the water, the remaining air inside will start to escape through the small area you left unsealed. You can help things along by gently pressing the bag against the food to eliminate air pockets.
Angle the bag so the opened end is highest to encourage the air to escape. Submerge the sealed part, eventually leaving only the opened corner exposed.
Step 5: Finish Sealing the Bag
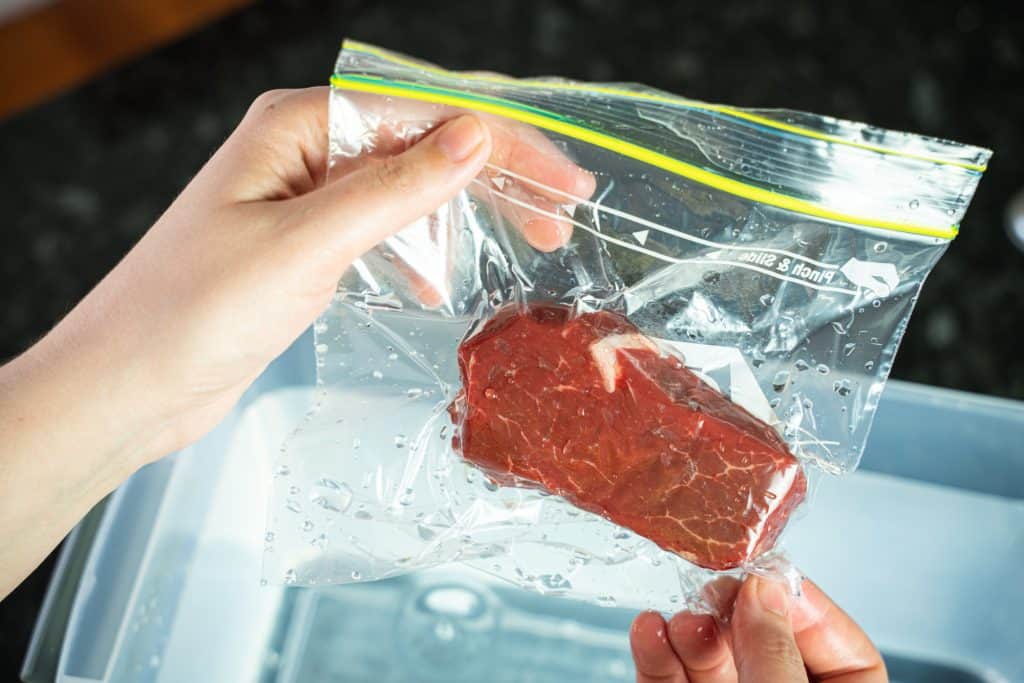
Once the bag is lowered into the water all the way up to the seal, and you’ve massaged away any air pockets, it’s time to finish sealing the bag. Do this while the bag is still in the water, so that the weight and pressure of the water keep the air out as you seal it.
And just like that, there you have it! A sealed bag with nearly all of the air removed, without any need for buying a fancy vacuum sealer. Now you’re ready to cook it in a sous vide bath.
Why Do I Need to Remove the Air From the Bag?
If you’re new to sous vide cooking, you may be wondering why you need to go through all this hassle. Why can’t you just pop your food in a bag, seal it the usual way, and start cooking it?
There are several problems with this scenario, and reasons to remove as much air as possible.
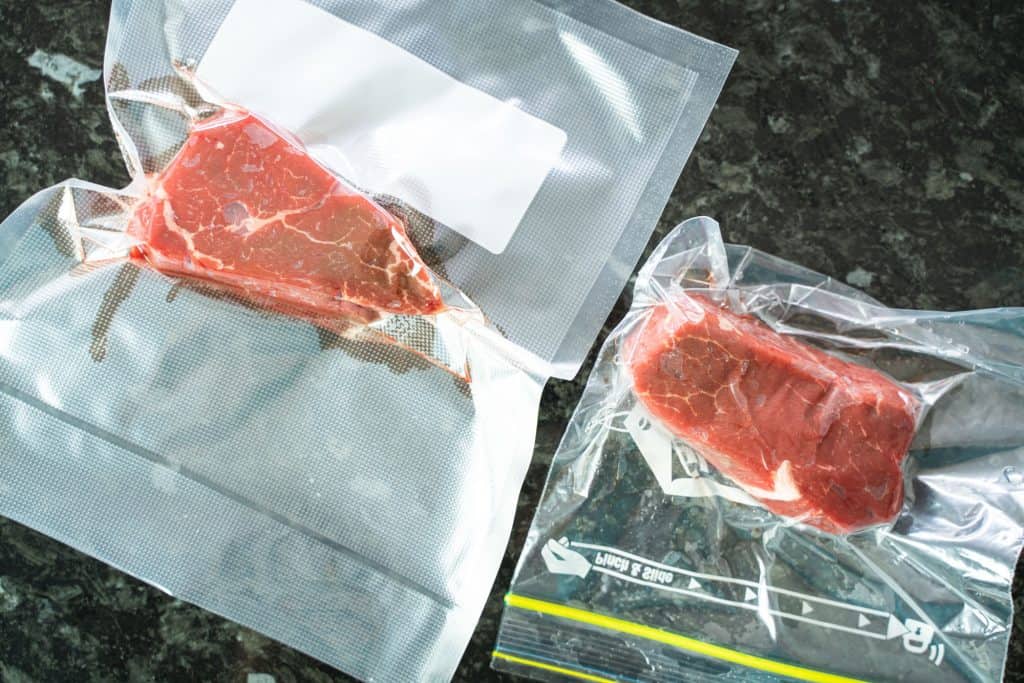
To understand why air is an issue, you first need to know that water conducts heat dramatically more efficiently than air. To sous vide effectively, this means you’ll want liquid to be in contact (through the barrier of plastic) with as much surface area of your food as possible.
A steak in an air-free plastic bag submerged in hot water will be surrounded by the water on all sides, efficiently receiving the heat. A steak in a bag half full of air will only be exposed to water on the bottom and sides, with an air bubble in the plastic above it.
Naturally, this means that the steak will cook less evenly, since the part in the water is receiving heat much more efficiently than the part in the air bubble. It can even be unsafe, with the air-covered portions of the food potentially cool enough to be in the food temperature “danger zone.”
Finally, having an excessive amount of air in the bag can even cause it to float, depending on the weight of the food inside. This is even worse than simply having an air pocket underwater, both in terms of food safety and evenness of cooking.
In short: if you want to be safe with your sous vide cooking and have the incredible results the technique is capable of, remove as much air as possible.
Do I Need to Get Every Bit of Air Out?
Now that you understand the importance of removing air, let’s be realistic. When you’re using the water displacement method, there’s almost no chance that you’ll get absolutely all of the air out of your bag. You can get close, but it’s unlikely to be perfect.
As long as there are only very small bits of air remaining, this isn’t a problem. The occasional tiny bubble is almost inevitable, and the heat will transfer through the food efficiently enough that very small bubbles of air shouldn’t generally be a safety issue.
If you’re concerned about the small remnants of air but are struggling to get them all out, try this handy trick: add some oil to the bag! Oil has the benefits of displacing any air around the food you’re cooking, potentially adding flavor to certain proteins (although it might actually remove flavor from others), and even improving the appearance of certain foods.
Can I Always Use the Water Displacement Method Instead of a Vacuum Sealer?
Usually, but not always. If your goal is simply to cook your food to a controlled temperature for a relatively limited period of time and then consume it quickly, you can absolutely do it without a vacuum sealer and just use the water displacement method.
The challenge comes when you get into certain specific tasks. A vacuum sealer is preferable if you’re planning to sous vide your food for more than several hours. We’ve found that, very rarely, resealable plastic bags can open after many hours of cooking and allow water in. This has only happened to us twice, and may have been a flaw with the bag, but it’s worth noting.
If you’re planning to store your food for weeks after you sous vide it, a vacuum sealer will help too. Since it gets out more air, it’s more sanitary and allows you to store sous vide vegetables longer. Removing all the air also prevents your foods from the dreaded freezer burn if you want to store sous vide products in the freezer after cooking them.
Finally, your typical Ziploc-style bags won’t start melting until around 195 degrees Fahrenheit or 90.6 degrees Celsius, but they may have issues with opening up at temperatures as low as 158 degrees Fahrenheit or 70 degrees Celsius. You generally won’t sous vide foods at over 195°F/90.6°C anyway, but if you want to cook your food at over 158°F, you may prefer to use vacuum sealing bags specifically made for sous vide cooking. This will help ensure that your bags don’t break, allowing water in and ruining your meal.
Other than these specific circumstances, you should have no issues using the water displacement method instead of a vacuum sealer. But with that said, if you want to get serious about sous vide and have the flexibility that comes with vacuum-sealed bags, we recommend that you eventually invest in a vacuum sealer. Check out our guide to the best vacuum sealers for sous vide to start figuring out which one is best for you!
In Summary
The water displacement method for sous vide involves 5 simple steps:
- Put the food in a resealable bag and prepare your water bath
- Remove most of the air from the bag
- Seal the bag most of the way
- Immerse the bag in water (gradually), leaving the opening exposed
- Finish sealing the bag
In this process, the pressure of the water around the bag squeezes most of the air out, leaving you with an almost air-free bag ready for sous vide cooking without the use of a vacuum sealer.
This method works for almost every preparation for sous vide cooking, with a few notable exceptions. If you find that you want to store your food for longer (in the refrigerator or freezer), cook your food in the sous vide bath for more than a couple of hours at a time, or cook it at temperatures above 158°F/70°C, you should consider investing in a vacuum sealer.