An immersion blender is an invaluable kitchen tool that has a wide range of uses. It’s great for blending soups, sauces, and smoothies, of course. But you can also use it for so many other things. Try it for whipped cream or dalgona coffee, for example! It’s also great for making emulsions like mayonnaise or vinaigrette. Depending on which attachments came with your device, you might also find it’s excellent at chopping onions, crushing spices, making meringue, and much more.
But until you know how to use your immersion blender, all of this might feel overwhelmingly out of reach. That’s why we’ve created this article that starts with the absolute basics! Here you’ll learn our 9-step process for exactly how to use an immersion blender. You’ll also be able to read about how to clean your device, as well as how to use it for specific tasks. (And also which jobs it’s not a great fit for. Yes, there are a few!)
If you have any questions that aren’t addressed in this article, please feel free to email us and let us know! We’ve covered the most common reader questions, but we’re happy to update the guide if you’re wondering something else.
Table of Contents
How to Use an Immersion Blender: The Basics
Before we dive into various tips and tricks that you can use, let’s cover the basics of how to use an immersion blender. If you’ve never used one before, want a refresher, or need to double-check that your technique is right, this is where to start!
First things first: read the manufacturer’s instructions! If they say anything different from any of the steps listed here, follow their instructions instead. As you read the instructions, keep an eye out for two specific things:
- The maximum temperature that your food should be for your specific device.
- How long you can continuously run your device without giving it a break.
Before you begin: ensure the food you want to blend is at an acceptable temperature and in an appropriate container. This means that it shouldn’t be near boiling, as there’s always a potential for splashing and you can end up burned if it’s too hot. You may even melt your immersion blender! You should be able to find the maximum allowed temperature in your manufacturer’s instructions.
Your container shouldn’t be completely full to the brim, as the contents will need to move as they’re being blended, and it should be wide enough to comfortably fit the blender.
Step 1: Choose and attach the blades of your choice.
Many immersion blenders come with a variety of blades and attachments, so choose the one that’s right for the job! It’s very important to attach the correct blade before you plug in the immersion blender for the sake of safety. If your device isn’t plugged in yet, there’s no way you can accidentally turn it on while you’re fiddling with the blades! (Many cordless immersion blenders, which obviously don’t need to be plugged in, have safety mechanisms to prevent this too.)
Step 2: Plug in the immersion blender.
You should use an outlet close enough to the food you want to blend that you can reach easily, without strain on the cord. (If you’re using a cordless immersion blender, ensure your battery is charged enough.)
Step 3: Insert the blender into the food.
The last couple of inches (including the entire widened tip holding the blades) should be under your food. This is particularly important if you’re blending something fairly liquid-heavy such as a sauce or soup. Failing to insert the blender into the liquid before turning it on is one of the main causes for splashes and spills. Important note: don’t insert the blender deeper than the “max” line, which most of them have visible on the outside.
Step 4: Turn on the immersion blender.
You should only turn it on once the tip is already below the level of the food. This avoids messy splashing and spraying of the food.
Step 5: Move the blender around in the food.
Depending on what you’re making and your container shape/size, you may find it’s helpful to simply move the blender up and down. (As you do so, make sure you don’t lift it too high out of the food, which will splatter. Also, don’t submerge it too deeply; keep an eye on its “max” line.)
You can also tilt it at different angles to pull different sections of food through, or even tilt the container holding the food, if you can do so safely. Moving the blender and/or container helps ensure that all of the food goes through, instead of just blending a particular area within the container.
Step 6: Turn the immersion blender off.
Do this while it’s still under the level of the food. If you pull the device out of the food while it’s still running and then turn it off afterward, it will splash food around on its way out. This is a common mistake, and a big reason why many people think that these tools are messy. By turning it off while it’s still under the food, you’ll avoid this issue.
Step 7: Remove the blender from the food.
Since it’s already turned off, your food won’t splatter as you take the blender out!
Step 8: Unplug the device.
Of course, this assumes you’re using a corded blender; if you’re using a cordless one instead, obviously you can skip this step!
Step 9: Disassemble and clean your immersion blender.
Consult the manufacturer’s instructions for details on how to clean your particular device. In general, I prefer to hand-wash the bladed portion of the blender, even if it’s supposedly dishwasher-safe, to keep the blades as sharp as possible. The upper motorized part of the blender usually isn’t safe to wash. If necessary, you can generally wipe it with a warm, damp cloth.
I like to at least rinse the bladed area of my immersion blender right after using it, even if I don’t have time to fully wash it immediately. This gets off the bulk of the food and helps prevent it from getting stubbornly full of dried soup or sauce in the hard-to-reach areas.
How Do You Keep an Immersion Blender From Splattering?
This is one of the most common questions we hear, and luckily, it’s an easy one to answer!
Preventing your immersion blender from splattering is as simple as this: always turn it on and off when it’s fully submerged in the food you’re blending. Almost all splattering happens when the blender is running and the blades are partially submerged.
Ensuring that the bladed section is fully submerged at all times that the device is running means no splatter! Of course, you’ll also need to be careful not to lift the blender too high out of the food while moving it around.
In short: submerged blades mean no splatter.
Are Immersion Blenders Messy?
No! At least not when they’re used properly. You’ll need to avoid splatter by ensuring the blades are submerged at all times that the blender is running. (See the above section for more details on this!)
In fact, immersion blenders can actually reduce mess by eliminating the need for extra dishes. You can simply blend your food in the pot, bowl, jar, or container where you made it rather than transferring it into a blender, which you would then need to wash. This also means there’s no need to use a ladle, funnel, measuring cup, or other set of devices to transfer your food.
Can You Put an Immersion Blender in Hot Soup?
This depends on the manufacturer’s instructions for your specific device.
As a general rule, yes, you can use an immersion blender in hot soup! This is one of the ways that I personally use mine most often, in fact. It would be an insane hassle to need to cook the soup, then cool it, then blend it, then reheat it to serve. Every immersion blender I’ve ever owned has been designed with this in mind, and capable of blending hot soups.
However, we don’t recommend using one in boiling or near-boiling soup for a couple of specific reasons:
- If the liquid is too hot and you accidentally splatter some of it, you can burn yourself. Obviously this should be avoided at all costs!
- Some plastics begin to melt at around the boiling point. This is why it’s so important to check the manufacturer’s instructions and ensure that your blender is capable of handling the temperature in question.
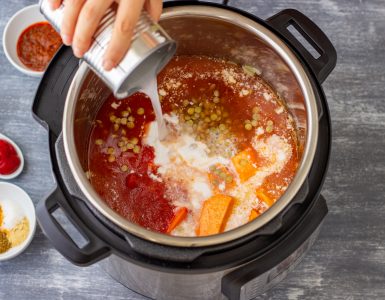
How Do You Use an Immersion Blender For Soup?
I personally like to use the blender straight in the pot where I cooked the soup! This saves time, energy, hassle, and dishes. And it’s much easier than transferring multiple batches of soup into a traditional blender.
Here are the basics on how to blend soup with an immersion blender:
- Ensure the soup is at a temperature that’s safe and within the manufacturer’s recommended guidelines.
- Prepare your immersion blender by attaching the blade of your choice.
- Plug in the blender near your pot of soup, making sure that the cord is long enough to reach easily.
- Insert the tip of the blender into the soup until the entire bladed area is fully submerged. (However, don’t submerge the blender above the “max” line!)
- Turn on the blender. Since the bladed area is already under the soup, there should be no splatter!
- Move the blender gently up, down, and around in the pot of soup. Don’t lift the blades above the liquid level, but feel free to tilt the blender to better blend specific areas. If the soup pot isn’t too heavy, you can even tilt the pot itself to move ingredients around to where the blender can reach them.
- When the soup is done, turn off the blender with the blades still submerged.
- Remove the blender from the pot of soup.
- Unplug the blender.
- Disassemble the blender and immediately wash (or at least rinse) the bladed area. This ensures that the soup won’t dry onto the blades or into hard-to-reach nooks and crannies.
Tip: if you want a creamy-yet-chunky soup, don’t blend the whole thing. Focus on blending half or a third of the pot to create a creamier, richer broth, while leaving the chunks or pieces intact in the other section of the pot.
How Do You Clean an Immersion Blender?
Personally, here’s what I do:
- Ensure the blender is unplugged. Don’t start taking it apart if it’s plugged in, as you might accidentally switch it on while your fingers are within reach of the blades. Ouch!
- Wipe down the upper, motorized part of the blender with a warm, damp cloth if necessary.
- Run hot water over the lower portion, including through and around the bladed area. This takes off any major food remnants and typically leaves the blender looking perfectly clean already.
- Wash the entire lower portion of the device (including the stem, blades, and guard) with a hot, soapy sponge, then rinse thoroughly. I hand-dry the blades, and leave the rest on a clean towel to air-dry.
And here’s another popular option:
- Fill a tall container with hot, soapy water. (Note: you’ll want to do this in your sink, because there’s potential for spills and splashes.)
- Insert the blender into the water as if it were soup. The blender should still be plugged in.
- Turn on the blender and “blend” the soapy water. As you do so, the water will swirl rapidly around the blades, guard, and stem, cleaning them.
- Rinse the blender with clean water to remove the soap, then hand-dry the blades.
For both of these methods, it’s important to clean the blender as soon as possible after using it! Even if you can’t fully wash it right away, at least give it a quick rinse when you’re done so you don’t end up with caked-on, dried food all over it.
If you happen to forget, though, don’t worry. Simply let the bottom part of the immersion blender soak in hot, soapy water for a while to loosen the dried food, then wash as usual.
Some immersion blenders have dishwasher-safe components. Check your manufacturer’s instructions to see which (if any) parts you can simply stick in the dishwasher! Regardless of what the manufacturer says, though, I recommend hand-washing and immediately drying the blades. This will help keep them sharper for longer.
Is an Immersion Blender Worth It?
This completely depends on how and what you cook! These devices are incredibly versatile and can handle much more than soups and sauces, but that doesn’t mean they’re for everyone.
For most home cooks, though, the answer is a resounding yes. And the longer you have yours, the more uses you’ll probably find for it!
This is one of the first tools that I got for our new home when my husband and I moved internationally. For a while there, our new kitchen basically had my collection of cherished knives (which had come with us), a wok, a cast iron pan, a sous vide circulator, and a new immersion blender—that’s how invaluable I find this tool. It’s absolutely one of my kitchen staples, and I suspect it will become one of yours too!
If you’re not fully sold on the idea yet, you can absolutely start with a budget option. It may not be as long-lasting or powerful as a higher-end model, but it’ll help you decide whether you want to make the investment.
The Different Types of Immersion Blender
There are two main types of immersion blender: corded and cordless.
In almost every case, we recommended a corded immersion blender. They’re generally both more powerful and more durable, which are two traits that we always look for in kitchen appliances. They’re also generally less expensive (although of course you can find ultra high-end models). Plus you can use them any time, instead of waiting for them to charge!
Their only real drawback is that they have a cord, which can admittedly be annoying as you’re cooking. I’ve definitely had my share of cord-in-soup moments, but still go for corded blenders instead of cordless ones.
The benefit of a cordless immersion blender, of course, is that it’s not tethered to the wall or dragging a cord behind it. This means that you can use it anywhere, whether you’re on a camping trip or just on the opposite side of your kitchen from an outlet. And you won’t accidentally drop the cord into your soup or knock over a glass or bottle with it.
However, to provide this convenience, there are some major trade offs:
- These devices tend to be less powerful and reliable than their corded counterparts.
- Cordless blenders are usually more expensive (with a few exceptions).
- There aren’t many options currently on the market, and most of them have some pretty serious issues that prevent us from wholeheartedly recommending them.
For these reasons, unless being cordless is your top priority in an immersion blender, we’d recommend a corded option instead. But if you’re absolutely set on a cordless option, go for the KitchenAid KHBBV53DG Cordless Hand Blender, which manages to avoid most of the issues with many of the others available.
What Is the Difference Between an Immersion Blender and a Hand Blender?
There isn’t one—these are two terms for the same device. You might also see it called a stick blender or a handheld blender.
There is, however, a big difference between a hand blender (or immersion blender) and a hand mixer.
The former is what we’ve been talking about throughout this article. It’s a stick-shaped piece of equipment that’s primarily designed to blend things, but may also come with attachments that allow you to use it for mixing, whipping, chopping, and more.
A hand mixer, on the other hand, is primarily designed for mixing. It typically has two whipping or beating attachments instead of just one. This is the tool you might be familiar with using for whipping cream or beating egg whites.
If you’re only planning on whipping, beating, and mixing, a hand mixer may be all you need. But if you also want to be able to blend, we recommend getting a hand blender too. The two tools serve very different purposes, and while some hand blenders can approximate hand mixers depending on their attachments, an ideally stocked kitchen would have both.
Will An Immersion Blender Scratch Pots?
If you use it carefully, no! Immersion blenders are made with a hooded area around the blade, so the blade itself won’t touch the bottom or sides of your pot as it rotates.
However, many of these devices are made of metal. If you scrape or drag it across your pot, especially if you do it with some effort behind it, it might scratch. This is essentially the same as any other metal utensil!
To avoid scratching, ensure that you hold the blender within the food you’re blending in the pot. Don’t drag or scrape it across the bottom of the pot.
Can You Use an Immersion Blender in a Nonstick Pan?
As long as you’re careful, yes! Just like with other pots, you’ll need to avoid scraping, banging, dragging, gouging, or wildly stirring with it. However, the blades are protected by a guard and won’t scratch across the pan.
We recommend being extra cautious not to allow the blender to come into contact with the pan, so you don’t scratch or damage the nonstick coating. If you’re not confident in being able to do this, transfer the food you want to blend to a different container instead.
Can You Use an Immersion Blender in a Glass Bowl?
Yes! Immersion blenders work well in just about any type of container, as long as it’s large enough to fit the blender and food comfortably. Of course, you’ll need to be gentle; don’t wildly bang the immersion blender around or you could potentially break or shatter the glass. (With that said, I’ve personally used various immersion blenders in glass bowls many, many times over the years and have never had an issue.)
One factor to keep in mind is that different types of glass are capable of handling different temperatures. Blending in a glass bowl shouldn’t be an issue if you’re not overly rough, but abrupt temperature changes might. Avoid pouring hot liquids into a cold glass bowl, or one that isn’t designed to handle that temperature.
How Long Can You Run an Immersion Blender?
There’s no one-size-fits-all answer, and you’ll need to check your manufacturer’s instructions for information specific to your device.
In general, most immersion blenders are designed to run for anywhere from 30 to 60 seconds before needing to rest for a few minutes.
This doesn’t sound like long, but in fact, it’s plenty of time to complete most common blending tasks! Even a pot of soup is typically done in under a minute. In other words, don’t let this potential limitation alarm you, because there’s a good chance you won’t be affected by it anyway.
Can You Use an Immersion Blender as a Mixer?
With the standard blending blade attachment, not really—or rather, you can, but the results won’t be ideal and we don’t recommend it. This is because mixing (like whipping) generally involves incorporating some air into the mixture, and an immersion blender is best used fully submerged.
However, many immersion blenders come with various attachments. Two of the most common are whisks and beaters. If you’re lucky enough to have an immersion blender with these attachments, you can absolutely use it as a mixer! Just select the correct attachment, stick it on, and start mixing.
Can I Use an Immersion Blender for Mashed Potatoes?
Here we’ve reached the realm of differentiating between “can” and “should.”
Yes, you absolutely can use an immersion blender to mash potatoes. But you absolutely should not do so, unless you’re going for an oddly sticky, gooey, gummy texture. Mashed potatoes made with an immersion blender will be anything but light and fluffy. If you’re in dire straits and don’t have a potato masher, choose a fork rather than your immersion blender.
However, some immersion blenders come with a beater attachment, like the kind you would commonly see on a hand mixer. If yours does, you can use this attachment to mash your potatoes! I still personally prefer the texture of other techniques, but the hand mixer attachment at least won’t create a gummy, starchy mess like the blender attachment will.
Can You Cream Butter and Sugar With an Immersion Blender?
Not with the standard blade attachment; you won’t get the results you’re going for. However, if your device came with a beater attachment (like what you’d typically see on a hand mixer), you can put that on to cream butter and sugar!
Can You Chop Onions With an Immersion Blender?
It depends on your device and what blades/accessories it came with. A standard blending blade won’t work to chop onions, because it will try to blend or liquify them instead.
However, many of these devices come with a chopping blade, which is specifically designed for purposes like this. If yours has this kind of blade, you’re in luck, and you can chop onions!
Tip: cut your onions into relatively small chunks before chopping them with your immersion blender. Most of these devices aren’t designed to handle large pieces of food (such as entire onions), even with the chopping blade.
Can You Use an Immersion Blender to Whip Eggs?
You can, but they’re not the ideal tool—at least, not with the standard blade. You’ll find that using the blade beats egg whites into meringue very quickly, but the resulting product is typically denser than usual, and more inclined to break.
This is because meringue is all about incorporating air into the egg whites, and immersion blenders aren’t designed to whip air into food. In fact, as you’ve read in our instructions on how to use one, they work best when they’re fully submerged. You can see the problem here!
That isn’t to say that you’re stuck whipping meringue by hand. If your blender came with a whisk or beater attachment, you can pop that on instead of the blades and then whip your egg whites into luscious perfection.
Can You Use an Immersion Blender to Whip Cream?
Yes! As with several of the other foods we’ve addressed, the main issue here is that these blenders aren’t designed to incorporate air into foods, especially using the standard blade attachment. However, whipped cream is a case where the result can actually turn out very well.
Here’s what we recommend: mix together the cream with any other ingredients you want to include (vanilla, sugar, syrup, etc.). Pour everything into a tall container that’s wide enough to easily accommodate your blender. The mixture should come no more than 1/4 of the way up the height of the container to help prevent splattering.
Insert the blender into the liquid, as usual, then turn it on. As you whip the cream, lift the blender partially out of the liquid and move it around to incorporate air. This is likely to spray cream around, which is why you’re using a tall container!
You’ll need to move the blender up and down, striking a balance between pulling the liquid cream at the bottom upward and exposing the blades to the air so it gets incorporated into the cream. It’s easier than it sounds, and you’ll get the hang of it quickly! Within about 30 to 60 seconds, you should have beautifully whipped cream. Just don’t keep whipping once it’s ready, or you’ll end up with butter!
Can You Make Whipped Dalgona Coffee With an Immersion Blender?
Yes! Use your typical recipe for dalgona coffee, then follow the procedure we’ve outlined for whipped cream (immediately above). The key is to use a tall container to catch any splatter as you lift your blender slightly out of the liquid to incorporate air, resulting in a luscious dalgona coffee.
Be aware that even with good technique to incorporate air, you probably won’t get as much volume as you would if you whipped your dalgona coffee by hand. You might also notice that the bubbles are larger and less consistently fine. However, the process is definitely easier and faster than hand-whipping, so it’s definitely up to you whether the tradeoff is worth it.
Conclusion
Once you learn how to use an immersion blender (which, honestly, is pretty simple and straightforward), you’ll open up a whole world of new possibilities in the kitchen. This is even more true if your device comes with a variety of attachments, which can turn the blender into a mixer, beater, whipper, and chopper.
We’ve explored the basic technique for how to use one of these devices in some depth, and also covered all of the most frequent questions we’ve heard about them! Do you have a question that isn’t addressed here? If so, please feel free to reach out by email and let us know.