This page may contain affiliate links. If you make a purchase through one of these links, we may earn a commission at no extra cost to you.
While getting into sous vide cooking may sound intimidating, you actually only need three things: a sous vide machine, food-safe plastic bags, and a large enough container. But once you start digging seriously into this technique, you may find that you wish for just a little more convenience, flavor, and flair.
We’ve chosen some of the best sous vide accessories out there to help you take the next steps on your sous vide journey. While all of these are optional, we love the convenience they provide and the potential higher quality of the resulting meals!
Table of Contents
The Top 9 Sous Vide Accessories
A Smoking Gun
Our recommendation: PolyScience Breville Gun Pro Smoke Infuser
Cooking your food in a gentle sous vide bath is an amazing way to get it perfectly done throughout, but it ends up lacking the usual signs of fiery cooking. It comes out without a seared crust, and doesn’t have any of the smoked or charred flavor you might expect. And while a pan can take care of the sear, you’ll want something a little more refined for the smoke.
A smoking gun lets you burn wood chips of your choice (or creative substitutes like tea, hay, herbs, or spices) to give your sous vide dishes a delightfully smoky flavor. And it’s not limited to sous vide! We particularly love pairing smoke with fancy cocktails to add an extra element of flavor.
Want other options? Check out our list of the best smoking guns!
A Kitchen Torch
Our recommendation: Iwatani PRO2 Culinary Butane Torch
The sous vide process leaves your food without a nice seared crust, but that doesn’t mean you need to serve or eat it that way! For many foods, the best practice is to sear it in a hot (ideally cast iron) pan after it’s done in its sous vide bath. Check out our guide to the perfect steak to learn more about how this works!
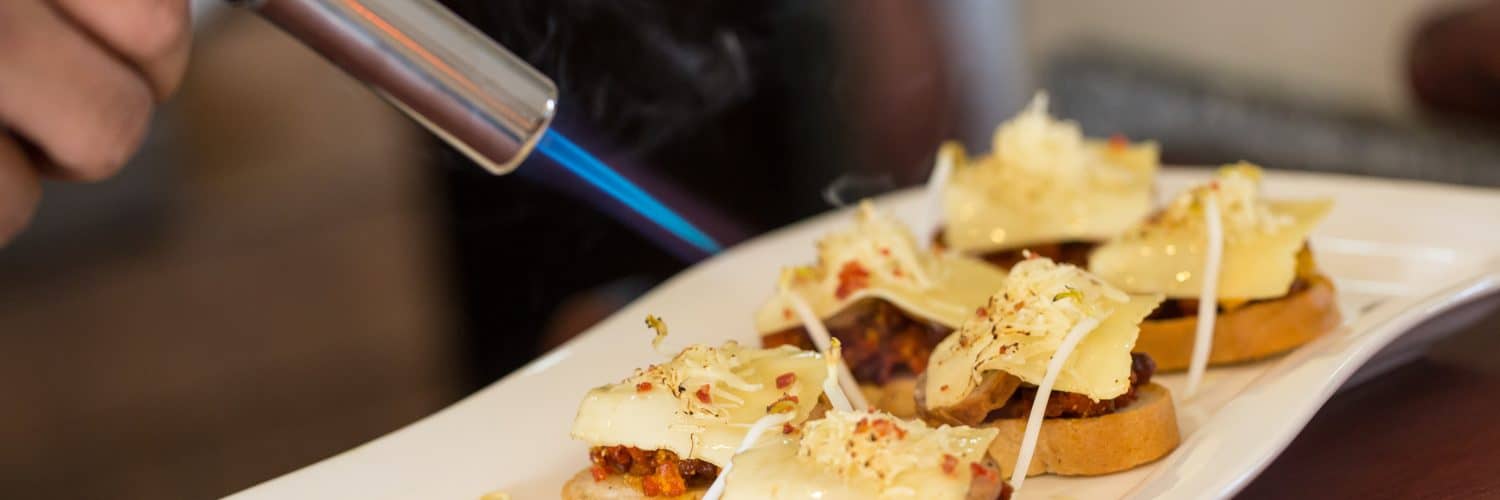
While your food is searing in the pan, you can torch the top side for an even deeper sear and better color and flavor development. This is completely optional, but helps to develop a gorgeous crust on foods like lamb or steak.
And some sous vide foods just aren’t suited for finishing in a pan at all. For those, a torch will be absolutely invaluable in adding that extra seared flavor that sous vide doesn’t obtain.
There are a lot of kitchen torches out there, and many of them are better suited to delicate tasks like creme brulee than to finishing a hearty sous vide protein. We recommend a stronger torch for sous vide, which is why we’ve picked the Iwatani as our recommendation here.
For more options, we’ve put together a list of the best torches for sous vide.
Sous Vide Weights
Our Recommendation: Set of Three Kenley Sous Vide Weights
Buoyancy, it turns out, is the enemy of perfectly cooked sous vide meals. If your would-be restaurant-worthy creation is bobbing in and out of the water bath, it will cook unevenly and may even be unsafe if certain parts are in the food temperature “danger zone.” For a perfect result, your food needs to be perfectly submerged. That’s where sous vide weights come in—and why they’re one of our favorite sous vide accessories!
Suitable for most cases, simple to use, and inexpensive by nature, weights are another case where we don’t recommend splurging, because the basics are fine. Just make sure the weights you choose are food-safe.
Include a sous vide weight (or two, or three—whatever gets it done!) in the bag with your food to keep it fully underwater until it’s time for it to emerge as a restaurant grade meal. Have you already sealed your bag of food, but discovered too late that it floats? Instead of opening it and resealing it with a weight inside, put the weight in a second bag, then put your bag of food into that bag too. Remove the air, seal, and return to your sous vide water bath.
Not in love with these weights? We have plenty of other sous vide weight recommendations that may suit you better!
Sous Vide Racks
Our Recommendation: EVERIE Weighted Sous Vide Rack
Sous vide racks come in where sous vide weights would cause further issues (or if you just plain prefer them!). The rack rests on the bottom of your cooking container, but holds your cooking bags off the bottom, ensuring that there’s room for water circulation and holding your bags perfectly in place. This means that it actually increases the amount of food you can cook in your container, because the rack ensures water circulation.
While it’s difficult to recommend a sous vide rack solution that meets every need, we’ve chosen the EVERIE rack because you have a choice of a smaller 7qt option or a larger 12qt option depending on your needs, the design reduces wobbling, and the rack includes customizable dividers. If neither of those options from EVERIE are quite the right fit for you, there are plenty of other great options out there to help ensure an ideal sous vide experience every time.
Which rack you should get depends on several factors, and the EVERIE may not be perfect for you. We have other sous vide rack recommendations that might be better for your setup.
Sous Vide Container
Our Recommendation: EVERIE 12qt Sous Vide Container Bundle
If you’re using an immersion circulator, one place you may actually want to splurge a bit is on a dedicated sous vide container. Designed to provide ideal conditions for perfect cooking, they’re a great investment for the sous vide enthusiast or someone that’s just looking to get off on the right foot! You can definitely get started with a large pot that you already have at home, but the right container can help you achieve those perfect results.
Again, finding a perfect solution for everyone is all but impossible (the possibilities are endless!). For most users, though, we recommend the EVERIE bundle for its compatibility with some of our favorite devices and comprehensive kit. With a container, lid, rack, and even an insulating sleeve to keep all that heat in the container and away from stray hands, you’ll be off to a fantastic start (or treating yourself to a fine upgrade) for a very reasonable price.
Not sure how big your container should be? Check out our guide to sous vide container sizes to help you figure it out! And if the EVERIE 12qt isn’t quite right, consult our list of the best sous vide containers to find the perfect one for you.
Trivet Mats
Our Recommendation: Smithcraft Silicone Trivets
Now that you’ve got a dedicated container for all those nice, hot sous vide baths you’ve probably found a favorite place to put it! Unfortunately, all those nice hot baths may not be so nice to your countertops or tabletop after a while. Especially if you want to use your sous vide setup on a wooden surface, you run the risk of stains and damage. (If you’ve ever seen the ring that a hot coffee mug leaves on a wooden table, you know what we’re talking about. Imagine that, but sous-vide-container sized.)
Luckily, there’s already a time-honored product for this particular possible snag: trivet mats. We love these big grey silicone mats by Smithcraft. And if your sous vide setup is so generous that it’s too big for one, just push them together for a total combined size of 12” x 18” (30.5 x 45.7 cm). The neutral grey color and understated style can fit with any kitchen, but there are lots of other trivet options that are more decorative or colorful, so you can protect your counters with all the understated grace or loud energy you’d like.
Chamber Vacuum Sealer
Our Recommendation: Avid Armor Chamber Vacuum Sealer Model USV20 Ultra Series
All sous vide begins with a well-sealed package for your food. After all, you won’t wow your guests (or yourself!) with a soggy, waterlogged steak. There are simple ways to seal bags without any extra sous vide accessories, like by using the water displacement method. The serious home chef, though, will someday turn their eye toward a vacuum sealer. At that point, you’ll need to decide whether you prefer a chamber vacuum sealer (which is larger and heavier but can handle liquids like soups, stews, sauces, and marinades), or a suction vacuum sealer (which is smaller and lighter, but can’t be used for liquids).
If you’ve opted for a chamber vacuum sealer, great choice! We love these machines for the extra versatility that they offer. Our absolute favorite for the home cook is the Avid Armor Chamber Vacuum Sealer Model USV20 Ultra Series, which offers an excellent price for great quality. Some of the most phenomenal customer service we’ve ever seen really seals the deal for us on this one.
While significantly more expensive than most more traditional vacuum sealers, chamber vacuum sealers have serious advantages, especially in the realm of sous vide. By regulating the pressure of the chamber so that the chamber and the bag share an equal pressure they prevent liquids from escaping their bags like suction based sealers do, this allows you to seal soups and stews as well as marinated foods with ease and no mess.
Curious about your options? Check out our list of the best chamber vacuum sealers to learn about others!
Vacuum Sealer
Our Recommendation: Anova Precision Vacuum Sealer
We’ve already mentioned that chamber vacuum sealers can handle liquids and suction vacuum sealers can’t, but you may be wondering why. Is this all just a scam to make people buy bigger, more expensive machines? Unfortunately not—the difference comes from the different ways the machines operate. A suction vacuum sealer uses suction (surprise surprise) to pull air out of a bag, often pulling any liquids inside with it. A chamber vacuum sealer, on the other hand, regulates the pressure inside the entire chamber instead of just sucking contents out of the bag. This means that liquids stay safely inside, allowing you to vacuum-seal soups, stews, sauces, curries, foods in marinades, and anything else with a lot of liquid.
If you’re not ready to shell out for a chamber sealer just yet, a good-quality suction vacuum sealer will work great for most purposes! A lot of the most common sous vide dishes don’t require too much moisture. And there are workarounds if necessary, like freezing liquids before putting them in the bag (so they go in solid and then melt) or using butter instead of oil.
Which vacuum sealer you choose depends on what you want to use it for. But for most home sous vide enthusiasts, our top pick is the Anova Precision Vacuum Sealer. It’s straightforward and easy to operate, small enough to tuck away in a drawer between uses, and reasonably priced. Plus it comes with a “Pulse” setting to help you seal bags with moist foods—although a chamber vacuum sealer is always going to be a better choice for dealing with liquids.
There are lots of vacuum sealers out there, and many of them work excellently. If the Anova doesn’t feel like the right fit, consult our list of the best vacuum sealers for sous vide to find some other options.
Waterproof Thermometer
Our Recommendation: ThermoPro TP19
Ensuring your water bath maintains precisely the perfect temperature is paramount in sous vide cooking. While sous vide cooking machines include a thermometer built in, they can be prone to losses of accuracy from time to time, especially if you’re a sous vide beginner just testing the water (get it?!) with a budget immersion circulator. With the dangers of letting your food linger in the temperature “danger zone” and the annoyance of expecting a perfectly cooked side and finding a tepid mess instead, we recommend investing in a reliable back up to make sure your device is accurate each time.
Our choice is the affordable but powerful ThermoPro TP19, accurate to less than a degree Fahrenheit or half a degree Celsius. It’s more than adequate to corroborate your device’s temperature measurements and ensure you’re cooking just the way you intend. Plus it doubles as a meat thermometer, so you can use it if you ever go back to cooking on the grill (but with a sous vide setup, why would you?).
AVOID: Sous Vide Balls
Our Recommendation: get a container with a lid instead!
We’re all about using what you have at home when you can, and for most purposes, a large stock pot works fine and you don’t absolutely need a sous vide container. But if you’re getting serious enough about this technique to consider getting sous vide balls, we really recommend just getting a container with a lid instead.
Many lidded containers aren’t much more expensive than getting sous vide balls, and the lid lets you easily and dramatically reduce evaporation without needing to figure out where to store dozens of plastic balls between uses.


