This page may contain affiliate links. If you make a purchase through one of these links, we may earn a commission at no extra cost to you.
With sous vide cooking becoming more and more popular among home cooks, you may find that you have more questions than answers! We’ve done our best to compile the answers to all of the most common questions here in this sous vide FAQ, but please don’t hesitate to contact us if you have a question that doesn’t appear on our list! We’re always happy to help (especially if we get to see pictures of your amazing meal when you’re done cooking it!).
Table of Contents
What Is Sous Vide?
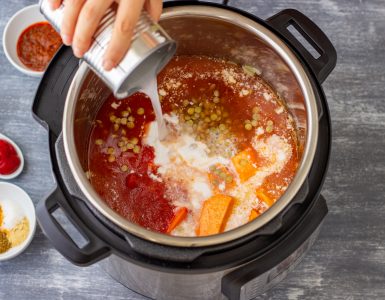
In short: it’s a culinary technique that involves cooking food inside of an enclosed package (usually a plastic bag) that’s submerged in a hot water bath held at a precise temperature. Over a cooking time that’s usually an hour or longer, the food rises to the exact temperature of the surrounding water.
What’s the Point of Sous Vide?
This cooking technique lets you bring your food to the exact temperature you want, and then hold it there for a while. This means that your food is cooked perfectly every single time, without you needing to closely monitor it.
Steak is the most popular example of the point of sous vide. This cooking technique lets you decide exactly how cooked you want your steak, with no risk of accidentally overcooking or undercooking it. If you’ve struggled to cook the perfect medium-rare steak and ended up a few degrees on the wrong side, you’ll understand just how invaluable this precision is.
Is Sous Vide Overrated?
In our opinion: no!
We love the complete control that this method gives over the final results. Plus it takes so much less attention than other cooking methods. A sous vide immersion circulator is sort of like a slow cooker for gourmands. Just like a slow cooker, you can set and forget it… but the result is delicious, perfectly cooked food instead of yet another stew.
Is Sous Vide Dangerous?
This is a particularly common question, and one that makes a lot of sense. After all, holding foods at a warm-but-not-hot temperature for prolonged periods can indeed be dangerous.
But with that said, if you’re paying attention to food safety guidelines and following best practices, sous vide cooking is safe. You either cook your food at temperatures above the “danger zone,” or you cook them for times short enough that the food doesn’t become dangerous.
Until and unless you understand the rules of food safety, we recommend that you follow recipes from trusted sources. Anova and Serious Eats are fantastic for this! And to learn more, you can check out our longer guide to sous vide safety.
What Are the Disadvantages of Sous Vide Cooking?
As great as sous vide cooking is, it does have a few disadvantages. Sous vide cooking:
- Requires specialized equipment. You’ll need a sous vide machine (generally an immersion circulator), a container to sous vide in, and sous-vide-appropriate bags for your food. But if you have a large stockpot and Ziploc-brand bags, you may not even need to buy anything except a circulator, since those will generally work fine!
- Has the potential to keep food in the temperature “danger zone” for too long. Sous vide cooking is safe when you do it right, but—like any other cooking style—it can be dangerous if done improperly. After all, you wouldn’t eat half-raw chicken, or a mayonnaise-based dip that had been left out overnight, right?
- Read the USDA’s information on the food temperature “danger zone” and our guide to safety in sous vide cooking to learn more about how to be safe!
- Takes some time. If you’re looking for a way to whip up a quick meal in 20 minutes, this isn’t it—unless, of course, you did your planning and started your sous vide bath in advance! Think of sous vide cooking like a gourmet slow cooker; it doesn’t create fast results, but it also doesn’t take much attention once you start it.
- Doesn’t create caramelization or the Maillard reaction. Both of these lead to gorgeous, delicious browning and complex flavors in your food. But since sous vide cooking is done in a water bath at a precise but relatively low temperature, this flavor development doesn’t occur. Instead, you’ll want to caramelize or sear before or after (or both before and after!) you sous vide your food.
- Creates a lot of plastic waste. In the traditional method of sous vide cooking, you use a disposable plastic bag for each major food item (so you might put a bunch of vegetables into one bag, but just one steak per bag). As you can imagine, the waste builds up fast! Luckily, there’s a solution: reusable silicone bags! While we don’t recommend the popular Stasher brand (for reasons you’ll learn in our detailed hands-on review), we like Platinum Pure’s simple pouch-like construction. Not a great fit? Check out our list of our top sous vide bag picks to learn more about options for reusable, single-use, and vacuum sealer bags.
How Do You Pronounce Sous Vide?
SOO-VEED (with equal emphasis on both syllables). Don’t make the common mistakes of calling it “SOOS VEED” or “SOO VEE,” both of which are incorrect!
Wondering why the final “s” in “sous” isn’t pronounced, or why the “d” is pronounced? Read the in-depth explanation in our guide to sous vide pronunciation.
Should I Salt Steak Before Sous Vide?
No! We did side-by-side tests and determined that for steak specifically, salting after sous vide cooking (but before the final sear) is the better overall option. (Wondering why? Learn more in our report on whether you should salt before or after sous vide!)
The most common exception to the salt-after-sous-vide-but-before-searing rule is fish. We recommend salting fish before sous vide, for the exact same reasons that we recommend salting steak afterward.
How Do You Sear a Steak After Sous Vide?
Glad you asked! We’ve also tested this pretty extensively as we researched our article on whether to sear a steak before or after sous vide cooking, and here’s what we personally do now.
- Put the steak in an ice bath for 5 minutes. It’s important to quickly cool the outside of the steak so that it can handle being seared without transferring too much heat into the center. After all, you just want to sear it, not further cook it!
- Open the windows and turn on any stove fans or vents.
- Preheat a cast iron skillet over high heat for 10 minutes.
- Meanwhile, remove your steak from the sous vide bag and pat dry. Season to taste.
- Add a thin layer of coconut oil to the now-hot skillet. We choose coconut oil for its neutral flavor and high smoke point.
- Place your dried and seasoned sous vide steak into the hot skillet. How long you’ll leave it on each side depends on how dark you want the crust:
- For a medium crust: sear for 45 seconds on each side. This is generally what we do, as it’s a great balance between developing a nice sear and maintaining the intended cook of the steak.
- For a darker, richer crust: sear for 60 to 90 seconds on each side, in 30-second intervals. Turning the steak over frequently helps it develop a crust without getting heated through, so you preserve the perfect cooking job you did in the sous vide bath.
- Optional: sear the steak with a kitchen torch on the exposed side. So as one side of the steak sears in the pan, you’re searing the other side with a kitchen torch. You then flip the steak as usual, and sear the second side in the pan while searing the first side with the torch.
- Sear the edges of the steak. These generally go much faster—expect 15 to 30 seconds per edge. The goal here is just to develop a bit of a sear and render any excess fat.
- Enjoy!
While nine steps just for searing may sound like a lot, it’s all pretty straightforward! To learn more about the rest of the process, check out our tutorial on how to sous vide a steak perfectly every time.
What Happens If You Sous Vide Too Long?
As long as your sous vide bath is above the food temperature “danger zone,” nothing happens in terms of safety. However, you’ll eventually begin to notice a loss in quality, especially when it comes to texture.
Food breaks down as it cooks. In the beginning stages, this leads to pleasant tenderness. As you draw out the cooking over a matter of hours or even days, though, it can break down too much. After all, you don’t want a mushy steak, right?
Fortunately, sous vide cooking is generally measured in hours instead of seconds or minutes. This gives you a lot of flexibility. A steak on the stovetop may go from perfect to overcooked in a matter of a few minutes. In sous vide cooking, a few extra minutes won’t make a difference; you’d generally need to cook your food for at least an hour or two longer than intended to see any serious loss of quality (and sometimes, you have even more flexibility than that).
What Is the Best Sous Vide Cooker?
Our top pick for the best sous vide immersion circulator is the Anova Culinary Sous Vide Precision Cooker. This device is popular for a reason! Of all the circulators we’ve reviewed, this one does the best job of balancing great features with an affordable price tag.
If you want to learn more about why this is our top pick, or check out the other devices that made the cut, head over to our list of the best immersion circulators. There you’ll find several other great devices, including options for home cooks on a budget as well as people who want true excellence.
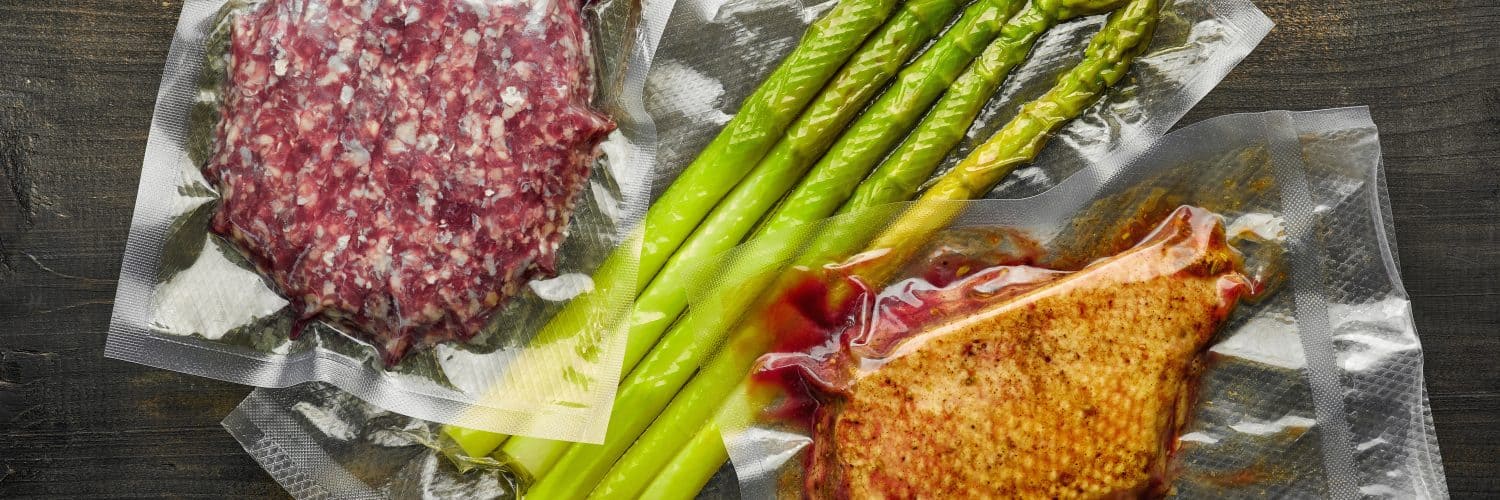
What Foods Can You Sous Vide?
The real question should be: what foods can’t you sous vide? That sounds simplistic, but it’s closer to true than you may think.
There are just a few exceptions:
- Anything that needs to cook at temperatures above approximately 200° F (93.3° C). Your sous vide machine may have a different high end limit, but should be somewhere in this range. At higher temperatures than this, you wouldn’t really be sous vide cooking your food—you’d just be boiling it in a bag.
- Baked goods. Trying to make muffins or bread in a sous vide bag isn’t going to work out too well. People keep trying to make sous vide bread, but we haven’t yet found a recipe that has impressed us.
- Anything that needs dry heat throughout the cooking process. Some foods (like steak!) can be sous vide cooked and then seared afterward. But anything that needs dry heat throughout (like toast, as an extreme example) won’t benefit from sous vide cooking.
- Delicate foods that you want to keep whole. If you want to make a fruit sauce or coulis, go ahead and sous vide those strawberries. But if you want to keep them intact, this may not be the best choice.
Some other foods (such as chicken breasts or some fish) may develop textures you don’t love when you sous vide them, but that’s a matter of experimentation to figure out for yourself.
If you want some ideas for getting started, here’s a list of just a few of the many foods that you can sous vide!
Popular sous vide foods:
- Steak (see our guide to how to make the perfect sous vide steak!)
- Eggs
- Vegetables, especially firm vegetables and root vegetables
- Lamb
- Pork chops
- Salmon
- Ribs
Unexpected foods that are great for sous vide cooking:
- Infused oils and drinks
- Confit anything (or almost anything, at least!)
- Custards
- Cheesecake
- Mashed potatoes
- Bacon
Are Ziploc Bags Safe for Sous Vide?
Yes. Ziploc-brand bags specifically are both BPA-free and dioxin-free, and they don’t melt at the temperatures involved in sous vide cooking. If you don’t have a vacuum sealer or bags designed for sous vide cooking, we absolutely recommend using Ziploc bags!
Note that we’re talking about true Ziploc-brand bags, not all Ziploc-style bags. If you’d prefer to use another brand, check with the manufacturer to ensure that they’re BPA-free, dioxin-free, and suitable for sous vide cooking.
Can I Leave My Sous Vide Unattended?
Please make your own safety determinations based on your device’s manufacturer’s instructions and your own comfort level. The following information is what we ourselves do, and may not be the right choice for you.
We feel comfortable leaving our sous vide unattended, especially if we’re relatively nearby (at home, in the garden, doing a quick trip to the store, etc.). This way, if anything goes catastrophically wrong, we’ll be close enough to deal with it! However, we’ve never had any issues at all despite using various sous vide cookers many times for years, so we personally have very little concern about leaving a sous vide bath unattended.
Many recipes from reputable sous vide experts include cook times of several days, and some manufacturers even offer settings to let you start your sous vide cook from work so your food will be ready by the time you get home. From that, you can infer for yourself the risk level potentially involved in leaving your sous vide unattended.
Here are the basic things we personally do when we want to cook unattended or overnight. We:
- Cover the container to minimize evaporation. This way, the water is much less likely to fall below the acceptable level for the machine to work.
- Ensure the machine is set for well over the time we’ll be away from it, to make sure it doesn’t shut off part of the way through cooking.
- Use sous vide weights to make sure the bag(s) will stay submerged. If you’re near the sous vide machine all the time it’s cooking, you can keep an eye on the bags. But if you’ll be away from it, you need to be confident that they’ll stay underwater.
- Put something heat-protective underneath the sous vide bath. Whether this is a silicone mat or simply a couple of layers of folded kitchen towels, we like to protect our surfaces from the prolonged heat involved in an unattended sous vide bath.
Should I Preheat the Water Bath?
In general, yes. Preheating your water bath ensures that your food spends as long as possible at the proper cooking temperature, instead of moving slowly through the food temperature “danger zone” as the water gradually heats up. It also means you know precisely how long your food has been cooking at the chosen temperature. While cooking time is generally pretty flexible in sous vide cooking, it’s still good practice to have this information and plan accordingly.
There’s one major exception to this policy of preheating your water bath. Some people actually set up their sous vide device in an ice bath along with the bag of food, and then start it remotely several hours before they want to eat the food. This is most commonly done by people who want to start the sous vide process while at work so that the food will be ready by the time they get home.
If you choose to do this, it is absolutely crucial that you make sure there’s enough ice to keep your food completely chilled until you’re going to start the machine. Don’t just throw a few ice cubes into a pot and hope for the best.
Always be aware of the “danger zone” and don’t let your food remain in it for too long! If you’re interested in this technique, we recommend first trying it on a day when you’ll be home all day. That way, you can see how long the ice takes to melt, and figure out exactly how much you need to use to make sure your food is chilled until you start the sous vide machine.
What If a Sous Vide Bag Leaked?
Don’t panic! In many cases, your sous vide food can be salvaged even if the bag leaked.
Here’s what to do:
- Shut off your sous vide machine. Getting fat or food particles inside can damage it, so you’ll want to stop it as quickly as possible.
- Remove the food and bag from the bath.
- Pour out the contaminated water. Thoroughly clean the container and the sous vide machine itself.
- Refill the container with clean, fresh water.
- As the container refills, dry off your food and transfer it to a new bag. We recommend double-bagging or double-sealing to help ensure that whatever went wrong the first time doesn’t become an issue again!
- Bring the sous vide bath up to the correct temperature.
- Put the food back in the sous vide bath and continue cooking until it’s done.
Note: if you believe your food was contaminated for any reason (for example, the water you used wasn’t drinking-quality water), discard it. While getting wet alone typically isn’t a safety issue, it naturally becomes a problem if the water in question isn’t potable.
Whew! Now that the immediate crisis is averted, head over to our complete post on sous vide bag leaks. There you’ll learn about common causes for leaks, how to avoid them, and why you might sometimes be tricked into thinking that your bag leaked even when it didn’t.
How to Sous Vide Without a Machine
Ideally: don’t. Sous vide cooking relies on maintaining a precise temperature over long periods, and is assisted by water circulation for even cooking. Both of these things are difficult to achieve without a sous vide machine, so we recommend using one if you possibly can.
Immersion circulators for sous vide are getting more affordable all the time, and our list of our top picks has a couple of fantastic budget-friendly options.
With that said, sometimes you need to make do with what you have. If you absolutely need to sous vide without a machine, here’s how you can do it:
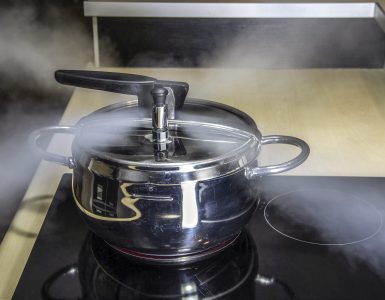
- Fill a large pot with plenty of water and put it on the stove. You’ll need enough water to fully and comfortably submerge your bag or bags of food.
- Attach a thermometer to the pot. Make sure it’s a type of thermometer that can withstand steam. If it doesn’t come with a clip, you can set up a makeshift way to get it to stay in place. (We’ve been known to use all-metal scissors balanced on the edge of a container, with the thermometer dangling through the finger holes.)
- Heat the water in the pot until it approaches your desired temperature. This is where things start to get tricky; you need to find the exact heat setting that will keep your water at this specific temperature. This is where the thermometer starts to come in handy. Use it to tweak the heat level until you find one that maintains your chosen temperature.
- Put your bagged food into your water bath. If you don’t have a vacuum sealer, you can simply use Ziploc-brand bags!
- Keep an eye on the temperature and adjust the heat as necessary. Adding your food to the pot will naturally lower the temperature a bit, but don’t blast the heat too high to compensate! One of the risks of not using a sous vide machine is that the bottom of the pot can get too hot if your flame is too high, and potentially melt the bag holding the food.
- Cook for the desired length of time. As your food cooks in the hot water bath, check the temperature every few minutes. This ensures that you don’t accidentally overcook or undercook your food. Also, stir the pot whenever you check the temperature. By doing so, you’ll get some of the benefits of circulating water.
Once your food is done, finish it as you would if you had used a sous vide machine. This means potentially seasoning and/or searing it to get it ready to eat. Enjoy!
Why Cook Sous Vide?
Two words: precision and flexibility.
Many traditional cooking methods take years of regular practice to get right—and even then, a brief distraction can ruin everything. (Don’t get me started on the time that someone came to the door right when the fresh pasta I had spent hours making was finally in the pot. The 30 seconds it took to politely tell them that I wasn’t interested in donating money to their cause was all it took to completely ruin the pasta, which had become a mushy mess.)
With sous vide cooking, you’re allowed to get distracted. You can answer the door and chat with whoever stopped by. You can postpone dinner by half an hour or an hour, even if you’ve already started cooking. And even so, you can expect a perfect result every single time.
This is because sous vide cooking uses a precise temperature to ensure that your food is perfectly cooked through. In most applications, once the food reaches that temperature, you can hold it there for at least a couple of hours before it even begins to lose quality. So you’re getting exceptional results and a perfect cook without needing to pay strict attention or practice your technique.
The most famous examples are steak and eggs. Sous vide lets you achieve a perfect medium-rare steak every single time, without needing to resort to pressing against different parts of your hand or face to try to figure out how thoroughly cooked the steak is. (Plus it will be cooked evenly throughout, without the traditional halo effect of a perfect center and overcooked outer layer).
And it lets you cook your eggs just the way you like them without trying to carefully time them to make sure they’re soft-boiled instead of hard-boiled.
Can You Sear Meat Before Sous Vide?
Yes. In fact, this is our best practice for making an absolutely perfect sous vide steak. However, in most cases you’ll need to sear afterward as well, so keep that in mind.
If you need to choose between searing only before or only after, sear afterward instead. Searing before cooking meat in a sous vide bath helps to develop the flavor and create a better crust, but only when you sear afterward to refresh the crust. If you only sear first, you’ll end up with tasty food with a soggy crust that’s missing something in terms of texture.
We particularly recommend searing both before and after you sous vide your meat if you plan to make a sauce with the liquid from the bag. While pre-seared meat produces slightly less liquid, it’s dramatically richer in flavor.
Check out our experiments, results, and recommendations in our post on whether to sear before or after sous vide. We did several side-by-side comparisons to figure out which technique produces the best results!
Should You Buy a Sous Vide Machine?
If you want to try sous vide cooking more than once or twice, yes, you absolutely should buy a sous vide immersion circulator.
You technically can sous vide without one, but it defeats a lot of the purpose. You’ll need to pay close attention to your pot on the stove to make sure it stays at exactly the right temperature, so you don’t have the flexibility to ignore your sous vide machine as you do other things. And it’s next to impossible to actually maintain a precise temperature on the stovetop, so you won’t get the perfect results that sous vide promises.
If you’re just curious about the method and want to give it a try, sure, do it on the stove and see how you like it. Just be aware that having an actual sous vide machine makes everything dramatically easier and produces the reliably perfect food that makes the technique so popular.
Is Sous Vide Expensive?
Not anymore! In the past, this cooking technique was the sole domain of high-end chefs, and it was hard to find an affordable device that the average home cook could justify buying. But these days, you can get a decent-quality sous vide immersion circulator (including a couple on our list of the best immersion circulators!) for under $100.
If you’re still struggling to justify the cost, think of it this way: how much does a perfect steak at a steakhouse cost? How many steaks would you need to make just as perfectly to pay for a device that costs $100 or less? For the average family, the answer may be that the device will effectively pay for itself in just one or two meals.
Other than the sous vide machine itself, you probably already have everything else that you need to get started! All that’s required is a large container (think of a soup pot or stock pot) and some airtight plastic bags. We love Ziploc-brand bags for the beginning home sous vide chef, because they’re likely to already be in your pantry and they’re safe for sous vide cooking. Other brands may work too, but check with the manufacturer to confirm.
In other words, there’s a good chance that the sous vide machine is the only financial investment you’ll need to make to get started. So you can probably open up this whole new world of precise yet flexible cooking for a cost of under $100.